Installing the software you will need
For this course you will need to install a Python interpreter and a development environment that you can use to write Python programs.
The software that we will be using to install and manage Python for us is Anaconda. You can download the installer for the Anaconda Individual Edition from https://www.anaconda.com/products/individual
After you run the Anaconda installer, you should launch the Anaconda Navigator application.
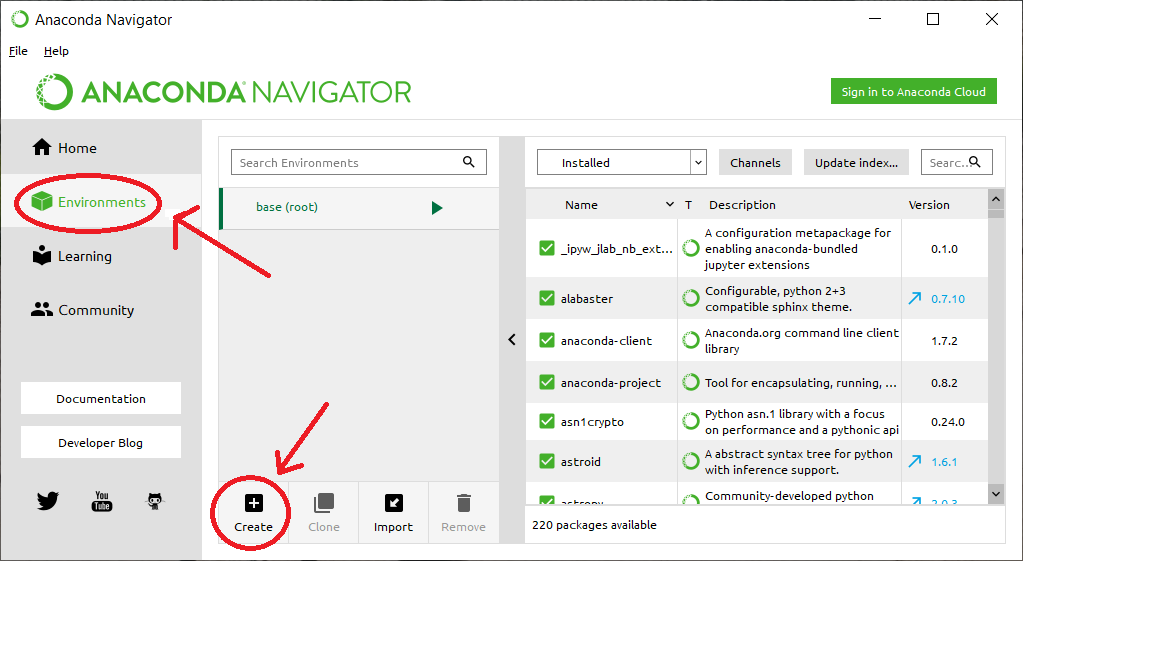
To help manage the Python system we will be using in this course you will need to create an Anaconda environment. To do this, click on the Environments tab in Navigator and then click the Create button at the bottom of the window.
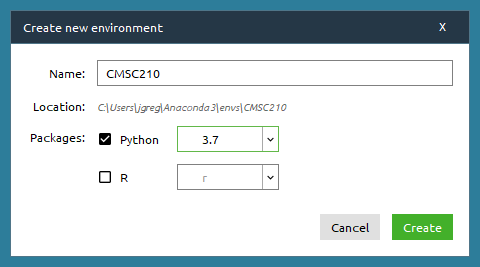
Name your new environment CMSC210 and make sure that the Python option is checked.
Next, download the installer for Visual Studio Code from https://code.visualstudio.com/ and run the installer.
Visual Studio Code is a popular open source code editor. Visual Studio Code is designed to work with many popular programming languages, including Python.
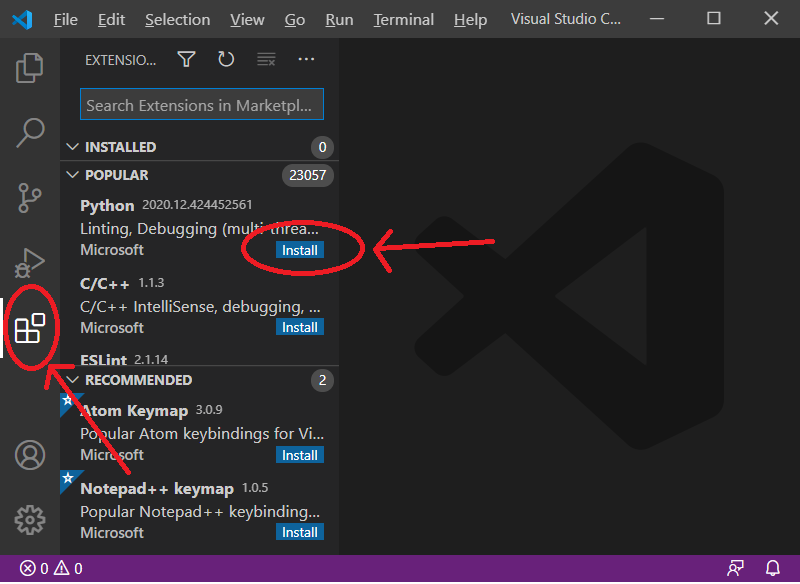
To configure Visual Studio Code to work with Python, you will need to install an extension in Visual Studio Code. Start up Visual Studio Code and click the extensions tab in the tab bar on the left edge of the window. This will bring up a list of extensions you can install. Find the Python extension and click Install.
Extra configuration for Windows
Windows users will have to run a couple of additional configuration steps to get Visual Studio Code to work with Anaconda:
1) Locate the Anaconda folder in the Windows start menu and run the Anaconda PowerShell Prompt program.
2) Type the command
conda init powershell
3) Close the application.
4) In Visual Studio Code select the New Terminal command from the Terminal menu.
5) In the terminal pane execute the command:
Set-ExecutionPolicy -Scope CurrentUser -ExecutionPolicy RemoteSigned
6) Close the terminal by clicking the trash can icon at the top of the terminal pane.
Creating your first Python project
Visual Studio Code expects you to create a folder for each programming project you work on. You should start by making a Projects folder in a convenient location. You will be placing the project folders for each project in this course in that folder.
For our first example, create folder named Hello in your projects folder.
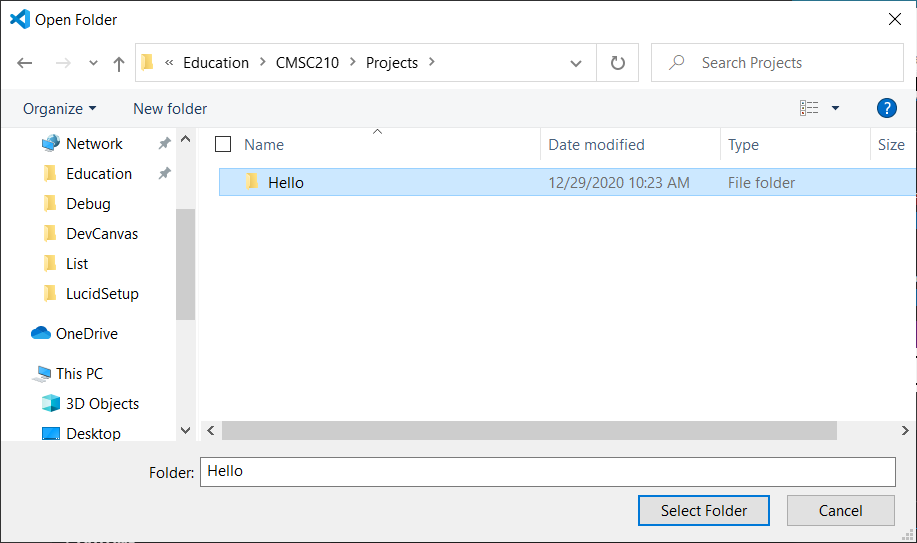
To open this project folder in Visual Studio Code, click the files tab in the tab bar, then click the Open Folder button.

Navigate to your Projects folder and select the Hello folder.
Initially the project folder is empty. The next step is to create a Python source code file in the project. To do this, click on the new file button to the right of the folder name. Alternatively, you can select the New File command from the File menu.

Name your new file hello.py. The .py extension identifies this file as a Python source code file.
Type or copy and paste the following line of code into the hello.py file:
print("Hello, World!")
Next, you will need to tell Visual Studio Code which Python interpreter to use to run your program. When you installed Anaconda you got one Python interpreter installed in Anaconda's base environment. When we created the CMSC210 environment in Anaconda that set up a second Python interpreter in that environment. To tell Visual Studio Code to use the Python interpreter in the CMSC210 environment, click the blue bar at the bottom of the window and select the Python interpreter in the CMSC210 environment from the list of interpreters that pops up.

Your first Python program is now ready to run. To run the program, click the run button in the upper right hand corner of the window.
This will open a terminal pane in the bottom right-hand corner of the window. That terminal pane will show you the output from the program.

When you are done working with a project in Code, you can close the project folder by selecting the Close Folder command from the file menu.
Dealing with errors
Visual Studio Code also includes some useful tools to help you track down and fix errors in your programs.
For the next example I am going to create a somewhat longer Python program that contains an error.
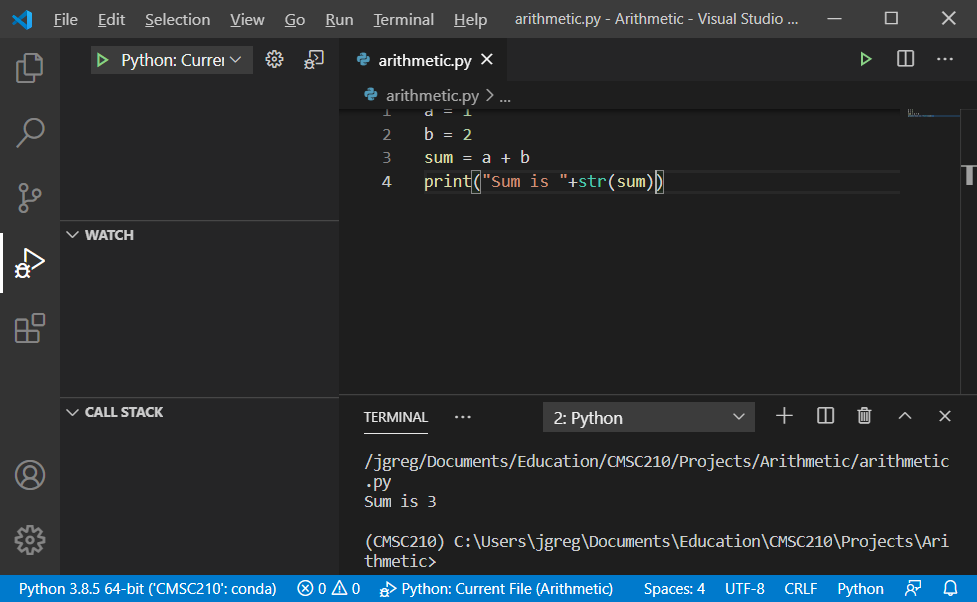
Go to your projects folder and make a new folder inside that named Arithmetic. Open that new folder in Code and create a file named arithmetic.py in that folder. Paste the following code into that file.
a = 1
b = 2
sum = a + b
print("Sum is " + sum)
This code contains an intentional error. Running this program will give you some output that looks like this:

The program produced an error message starting with the word 'Traceback'. The error message gives some details on what went wrong, including the fact that the error took place on line 4 in the print command.
If your program generates an error message, you will find it useful to run your program again in debug mode. Running your program in this mode produces more useful information about what went wrong.
To activate debug mode, click the debug tab in the tab bar on the left. To prepare your program to run in debug mode, click the link to create a launch.json file.

To run your program in debug mode, click the debug run button instead of the usual run button.

Now when your program runs you will see some more useful information in the editor window that tells you what went wrong. Running your program in debug mode also displays the current values of all of the variables in your program, which can also be useful when you are trying to track down an error.

When you run your program in debug mode, you will see a set of debugging control buttons at the top of the window. Click the stop button in the debugging controls to stop your program.

To fix the problem in this example program, replace the last line in the code with
print("Sum is " + str(sum))
and run again.
In the next set of lecture notes I will explain in more detail what is going on in this example program.