Suggested reading: 14.3, 14.4, 15.1-15.6
What is JavaFX?
JavaFX is a set of classes in the Java Class Library used to construct graphical user interface (GUI) applications.
These lecture notes, along with the suggested reading listed above, will take you through the basics of creating a JavaFX application.
Using NetBeans to make your first JavaFX application
NetBeans is set up to use several different build systems to build applications. The simplest build system available is Ant. Every project you created in CMSC 150 used that build system. Since JavaFX applications require that we pull in additional components to build an application, starting with JavaFX we are going to switch to using the next most powerful build system available in NetBeans, Maven. Maven is capable of automatically downloading additional components needed in an application when you build the application.
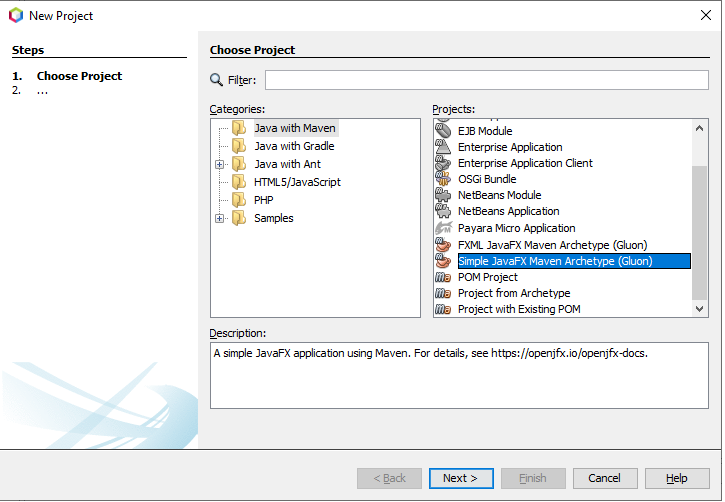
To set up our first simple JavaFX project, start by selecting New Project... from the File menu in NetBeans. In the new project dialog that appears, select the Java with Maven category, and then click on "Simple JavaFX Maven Archetype".
This will give you a project that already contains some JavaFX code to implement a simple GUI application.
A second example
The first example project you get when you ask NetBeans to make a simple Maven JavaFX application is fairly minimal. This example does the bare minimum required by JavaFX, setting up a stage, a scene in the stage, and a label in the scene.
As our next example we are going to look at a JavaFX application that has a few more interesting elements. Our next example will include a button that the user can click so we can begin to see how JavaFX handles simple user interactions.
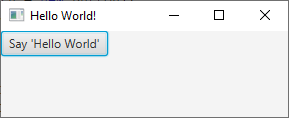
Follow the procedure outlined in the section above to make a new JavaFX application. Replace the start() method in the App class with the following code:
public void start(Stage primaryStage) {
    Button btn = new Button();
    btn.setText("Say 'Hello World'");

    StackPane root = new StackPane();
    VBox box = new VBox();
    box.getChildren().add(btn);
    Label label = new Label();
    box.getChildren().add(label);
    root.getChildren().add(box);

    btn.setOnAction(new ClickHandler(label));

    Scene scene = new Scene(root, 300, 250);

    primaryStage.setTitle("Hello World!");
    primaryStage.setScene(scene);
    primaryStage.show();
}
Also, insert the code for the following class at the bottom of the App.java file:
class ClickHandler implements EventHandler<ActionEvent> {
    public ClickHandler(Label label) {
        this.label = label;
    }

    public void handle(ActionEvent evt) {
        label.setText("Hello, World!");
    }

    private Label label;
}
Common elements in a JavaFX application
All JavaFX applications contain the following elements:
- A main window, called a stage in JavaFX.
- At least one Scene in the stage.
- A system of panes and boxes to organize GUI elements in the scene.
- One or more GUI elements, such as buttons and labels.
The usual procedure for setting up a scene is to build it from the bottom up. First, we make the GUI elements, then we make boxes and panes to organize the elements, and finally we put everything in the scene.
All JavaFX elements such as boxes and panes that are meant to contain other elements have a child list that we can access via the getChildren() method. We put elements inside other elements by adding things to child lists. In the code above you can see the button and the label objects being added as children of a VBox, and the VBox in turn being set as the child of a StackPane.
In addition to setting the structure for the window, we also call methods designed to set the properties of various elements. For example, the code in this example uses the button's setText() method to set the text the button will display.
Responding to user events
For a GUI application to be interactive, various elements such as buttons have to be able to respond to interactions from the user, such as clicks. In GUI applications user actions such as mouse clicks and key presses are called events. To set up an element such as a button to respond to user events, we arrange to connect special event handling code to the button.
Our first example demonstrates one way to do this in JavaFX. The first step is to connect an object to the button as the button's event handler via the button's setOnAction() method. The requirement here is that the object that we link to the button has to implement a particular interface, the EventHandler<ActionEvent> interface. That interface has one method in it, a handle() method that will get called when the user clicks on the button.
For the event handler code to do something useful, it will typically need to have access to one or more elements in the scene that will be affected by the button click. In this example, clicking the button will trigger a change in the text displayed in a label in the scene. To make this all work, the class we set up needs to have a member variable that is a reference to the label object. The code in handle() will use that reference to change the text shown in the label when the user clicks on the button.
A better way to handle events
Although the process for linking an event handler to a button is fairly straightforward, it is a little clunky. This process can get even more tedious when we start building applications with many buttons that need event handlers. As a fix for this, JavaFX allows us to use a simpler mechanism to set up event handlers.
To see how this mechanism works, remove the ClickHandler class completely and replace the line of code in start() that calls the button's setOnAction() method with this:
btn.setOnAction((e)->{label.setText("Hello, World!");});
The ClickHandler class that you just eliminated had a handle() method in it. That method took a single parameter, which was an ActionEvent object, e. The code we just put in place of the original code contains a lambda expression mapping that parameter e to a chunk of code that will run when the event takes place. This code is the code that used to live in the body of the handle() method. The new statement saves a lot of space over the original. The lambda expression replaces the ClickHandler class and its handle() method with a simpler alternative.