Starting your first Android project
Start up Android Studio and click the New Project button in the welcome screen.
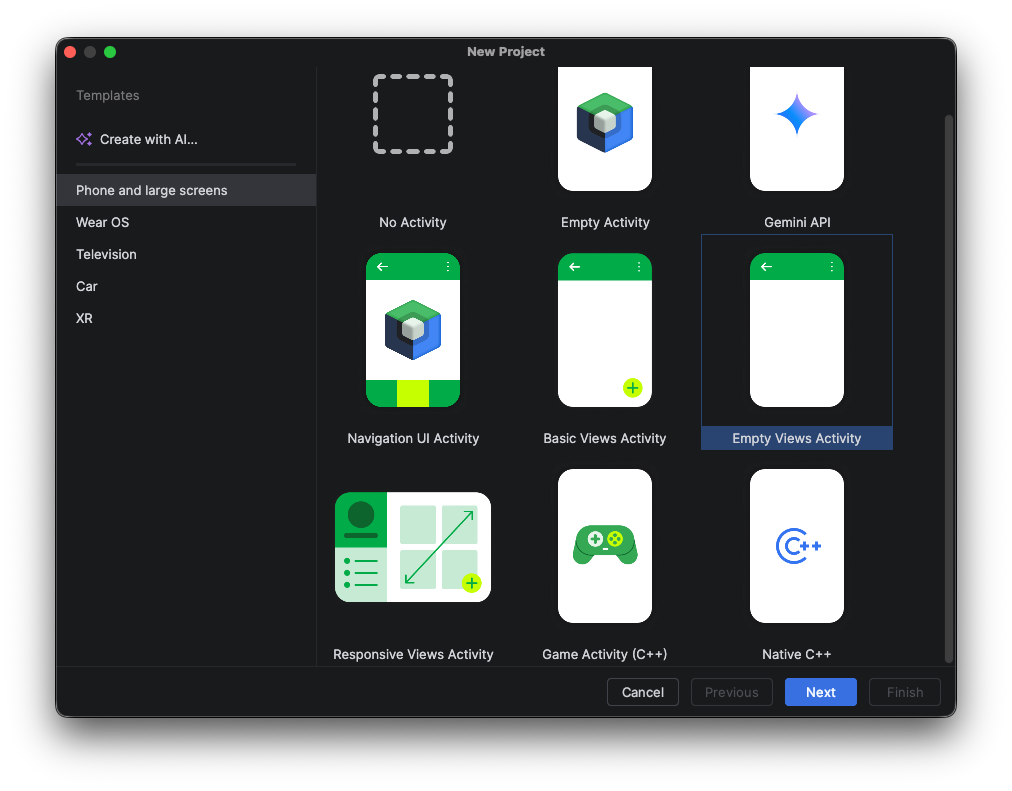
In the first dialog that appears, select the Phone and large screens category and the Empty Views Activity option.
On the next screen set up the project details such the project name and location.
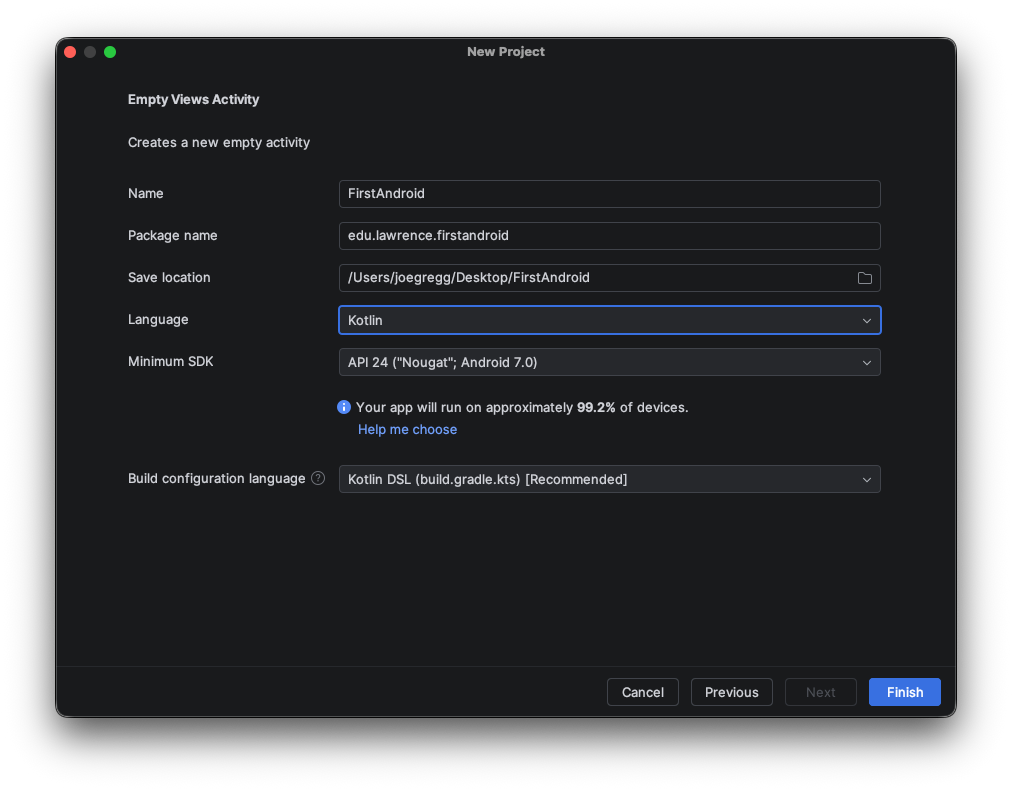
The default language for new Android projects is Kotlin, so we will be sticking with that option. It is possible to write Android applications in Java, but that language has been deprecated for a very long time - these days you will only encounter Java in much older Android projects.
The first time you create a project in Android Studio the application will need to download a large number of components. You will need to be patient during this process and wait until the Gradle Sync in Process message goes away.
When your first app is ready to run you will be running it on an emulator that simulates an Android device. You will need to set up that emulator before running your project for the first time. To do this, click on the Device Manager tab on the right side of the main window and then click the plus button and select the Virtual Device option.
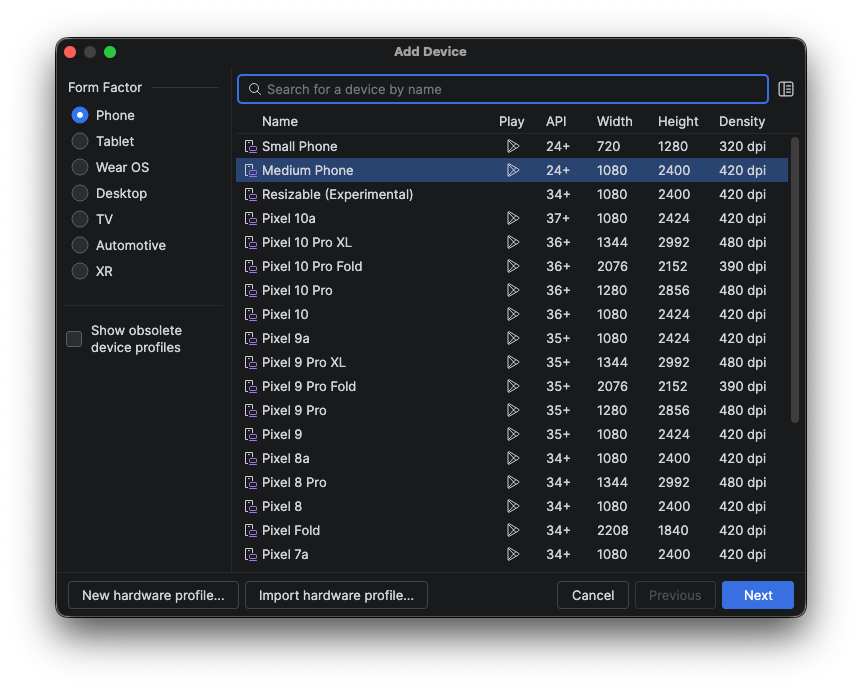
Select a device type from the list of available simulators and click next.
On the next screen you will be prompted to select a version of the Android operating system to run on the device. Select the version of the OS you want and click the Finish button to download that system image.
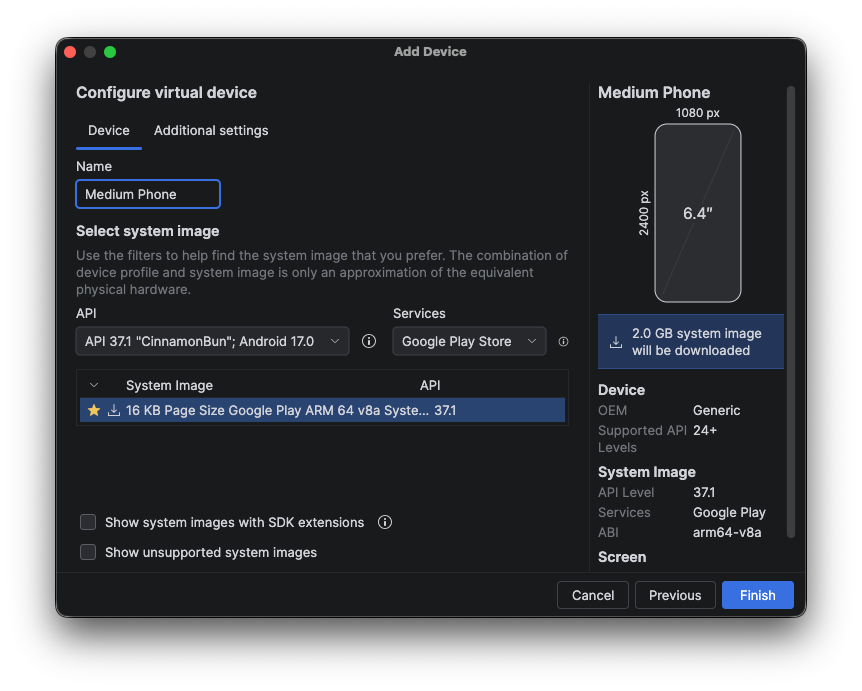
This step will also take a while, so please be patient.
Click through the final screen to finish the setup process. You should now see your emulator listed next to the green run triangle in the toolbar.
Designing Layouts for Activities
Android applications are divided into one or more distinct screens called activities. Each activity consists of a combination of a Kotlin source code file and an XML file that is used to set up the user interface for the activity.
You can find the layout file for the first activity inside the res/layout folder.
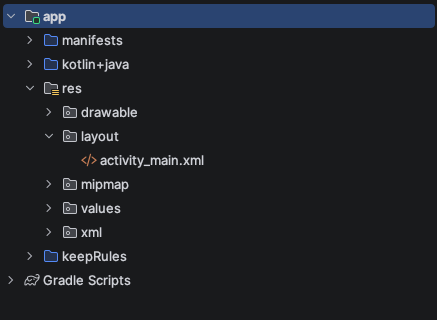
Double click this file to open the Layout editor.
The setup here is very similar to what you are used to in SceneBuilder in CMSC 250. There is a large central area in the editor that shows a preview of the user interface. To the left you will find a palette with components you can drag into the user interface and a component tree that shows you a list of all of the components in the layout. To the right you will find a properties section that shows properties of the currently selected item.
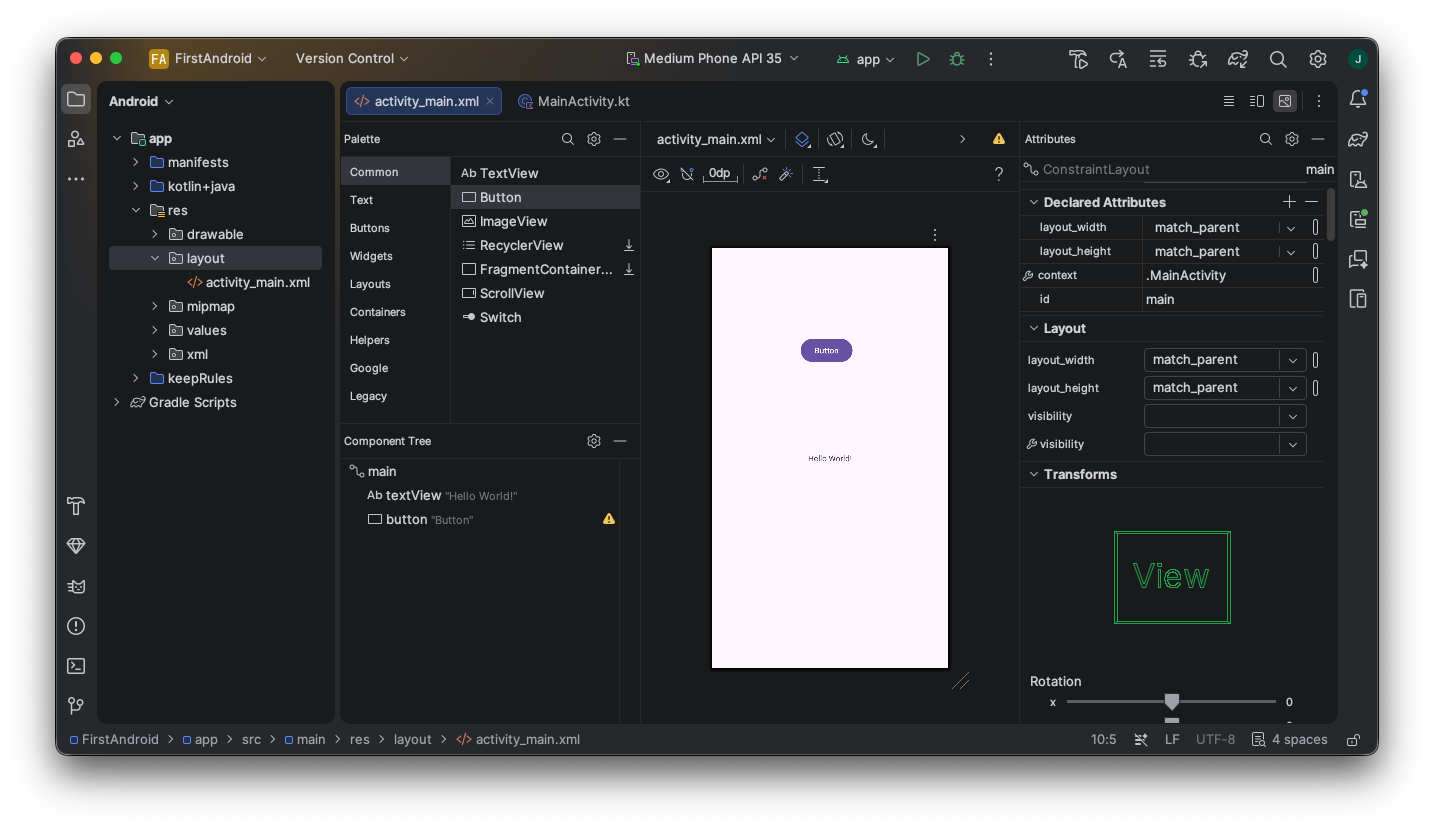
The default view in the design editor shows two views of your interface, a design view and a blueprint view. For our early projects we will be using only the design view. To dismiss the blueprint view, click the "Select Design Surface" button  and select the option Design.
For our first example we are going to create a simple user interface with a single label (called a TextView in Android) and a button. Drag a button from the palette and drop it into the interface.
A very important detail you will be working with in the layout editor is constraints for the elements of your interface. Constraints are used to position the elements of your user interface relative to the edges of the screen and relative to each other. When you click on a component in the layout to select it you will see a set of four circles spaced around the perimeter of the component.
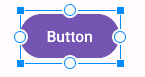
You will use these circles to set up constraints for the component. For example, if you drag from the circle on the left to the left edge of the screen you will get a constraint that positions the component relative to the left edge of the screen. If you then drag from the circle on the right to the right edge of the screen the button will end up centered in the screen.
If you click on the label you will see that it already has constraints attached to it that connect all four of its sides to the edges of the screen. This positions the label in the center of the screen.
Finally, to position the button relative to the label, drag a constraint from the top of the button to the top of the screen, and a constraint that connects the bottom of the button to the top of the label. This position the button above the label.
Your view should now look something like this:
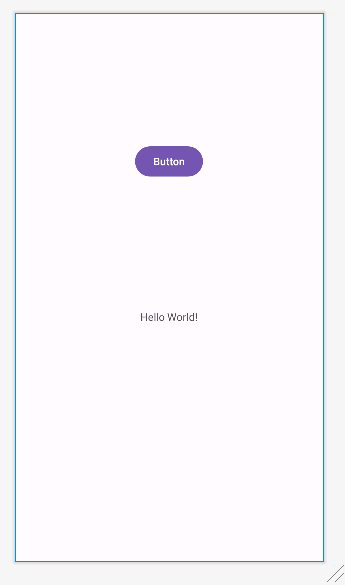
Finally, we will set some properties for the label and button. Set the text property of the label to be empty, and set the text property for the button to "Greet Me". Set the id property of the label to 'message'.
Write some code
Next, double-click on MainActivity in the Project view to bring up the source code for your activity.
Paste the following code into the MainActivity class.
fun doGreeting(view: View) {
    val msg = findViewById<TextView>(R.id.message)
    msg.text = "Hello, World!"
}
Some of the object types will be highlighted in red because you are missing import statements for them. To fix this, press the option-return combination on the keyboard (alt-enter on Windows) to fix the missing imports. Save your changes and then also compile your code by selecting Build Project from the Build menu.
The code you just inserted is going to be the action method for the button you set up earlier. The code for this method uses the findViewById() method to find the object that represents the label and then tells the label to display some text.
To connect the action method to the button, go back to the layout editor and click on the button. In the properties view locate the onClick property under Common Attributes. There should be a pulldown menu for that property that will allow you to select the doGreeting() method as the action method for the button.
Run the app
Now that everything is set up, you can run your app in the emulator. To do this, click the green run triangle in the toolbar.