An app with two activities
For our next example app we will construct an app with two activities in it. The first activity will prompt the user to enter their name.
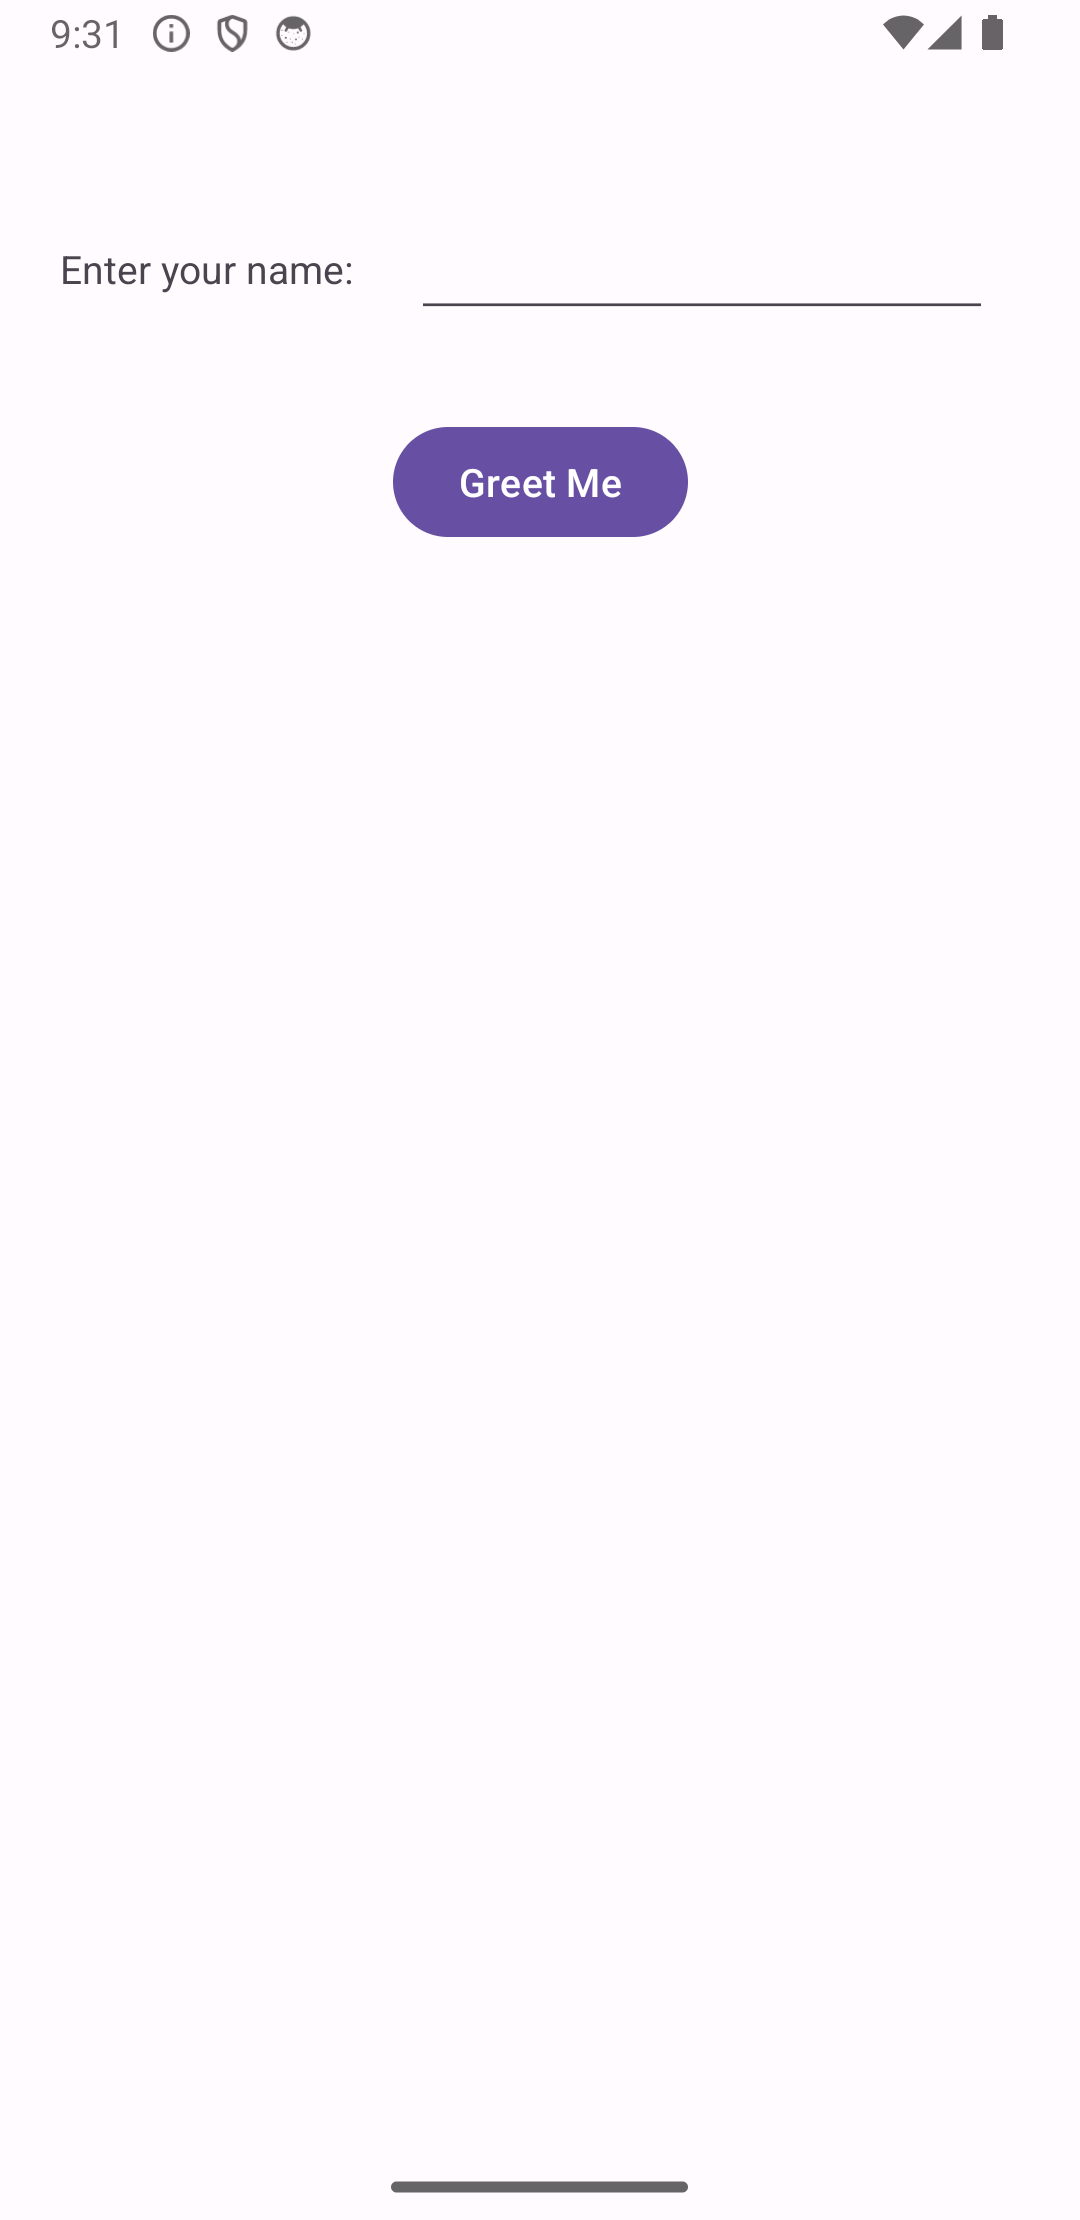
Clicking the "Greet Me" button will take the user to the second activity, where they will see a personalized greeting.

Start by creating a new project. As usual, select the Empty Views Activity option when setting up the project. Use the layout editor to put a text label, and text field, and a button in the activity. Android uses the PlainText component to implement a text field. As usual, don't forget to set up constraints for all of the objects to position them properly on the screen.
Give the PlainText component an id of 'name'.
Next, add this function to the MainActivity class:
fun doGreeting(view: View) {
    val nameField = findViewById<EditText?>(R.id.name)
    val name = nameField?.getText().toString()
    val intent: Intent = Intent(this, SecondActivity::class.java)
    intent.putExtra(NAME, name)
    startActivity(intent)
}
Also, link this method to the button in the layout editor.
This code shows an example of how to use an Intent object to move from one activity to another. When we set up the Intent object we tell it which class to use - this is how we tell the Intent which activity we want to switch to. Very often when we use an Intent to move to a new activity we will want to pass some data to the new activity. In this example we will want to pass the name that the user entered in this activity to the second activity so it can display a personalized greeting.
To add information to the Intent we use a put method. In this case, we want to put a String in the Intent, so we call putExtra(). If we had wanted to put an int in the Intent we would have used putIntExtra() instead. Since there is no limit to how many data items we can put in an Intent, each data item we add has to have a unique identifier. The NAME identifier we used here is defined as a member variable in a companion object associated with the MainActivity class:
companion object {
    const val NAME: String = "edu.lawrence.SecondAndroid.NAME"
}
In Kotlin a companion object introduces a secondary class that has only a single instance. Member variables of this class are similar to static member variables in Java. In this case the member variable NAME is essentially a static member of the MainActivity class.
Setting up the second activity
When we create an Android project we will always get a first activity in the project. For this project we will want to add a second activity. To do this, right-click on the package that contains your MainActivity class and select the option New/Activity/Empty Views Activity. Name the new class SecondActivity.
Set up the user interface for the second activity to have a single text label in it, and set the id for that piece of text to 'greeting'.
Then, modify the onCreate method in the new activity class to look like this:
override fun onCreate(savedInstanceState: Bundle?) {
    super.onCreate(savedInstanceState)
    enableEdgeToEdge()
    setContentView(R.layout.activity_second)
    ViewCompat.setOnApplyWindowInsetsListener(findViewById(R.id.main)) { v, insets ->
        val systemBars = insets.getInsets(WindowInsetsCompat.Type.systemBars())
        v.setPadding(systemBars.left, systemBars.top, systemBars.right, systemBars.bottom)
        insets
    }
    var name: String? = "unknown person"
    var intent = getIntent();
    if (intent != null) name = intent.getStringExtra(MainActivity.NAME)
    val greeting = findViewById<TextView?>(R.id.greeting)
    greeting?.setText("Hello, " + name + ". Welcome to Android.")

}
As you can see, the last bit of code in this method sets a personalized greeting for the user. To get the name portion of the greeting we use the getIntent() method defined in the Activity class to get the Intent object that launched our activity. We can then call the getStringExtra() method to pull the user's name out of the Intent. Note that when we do that we have to use the same identifier we used in the first activity to store the name.