SwiftUI with SwiftData example
Our next example is a SwiftUI app that makes use of the SwiftData framework to store and manage a more complex set of objects locally. The example app is a simple gradebook app that allows the user to record grades for a students and a set of assignments and exams.
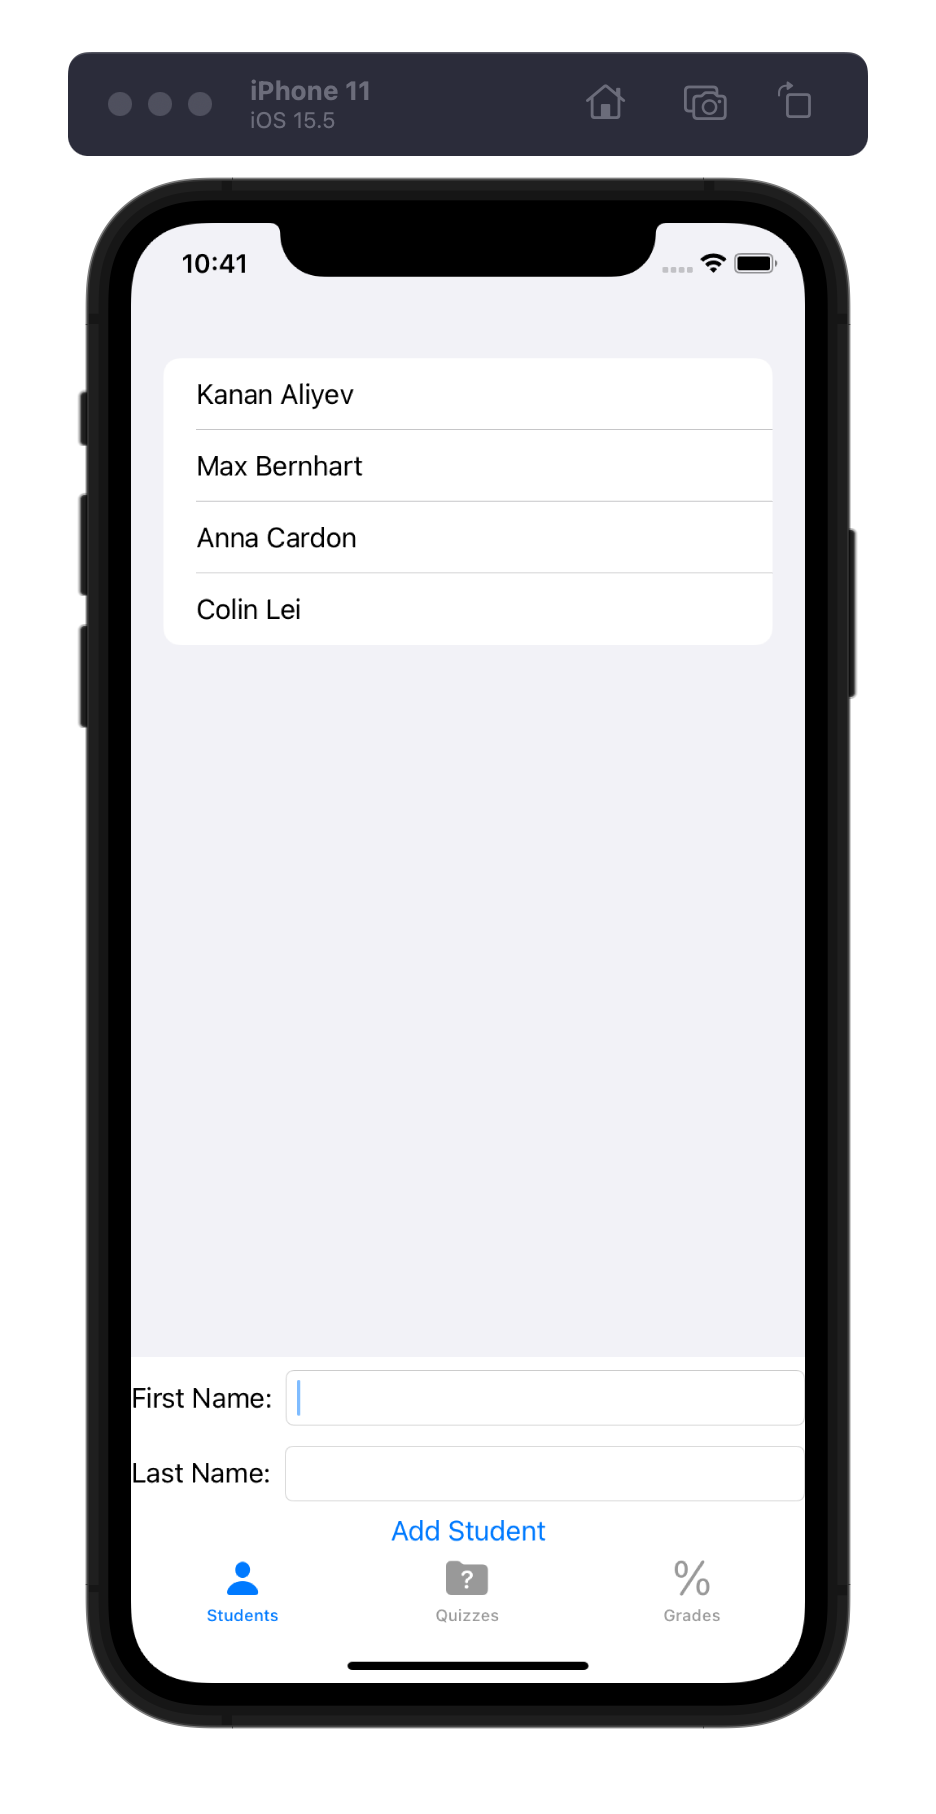
The app has a tabbed interface, with tabs that allow the user to create and manage a list of students, create and manage a set of quizzes, and a tab where the user can record grades for the quizzes.
Using SwiftData to manage an app's data
Our example app needs to be able to store and retrieve collections of interrelated objects. This app will deal with Student objects, Quiz objects, and Grade objects. Furthermore, these things are related to each other: each Student is connected to a set of Grades and each Quiz is connected to a set of Grades.
The SwiftData framework is a system for managing and storing networks of interrelated objects in an app. This example will show you how to use SwiftData in a SwiftUI application.
Creating a set of Model classes
The classes that SwiftData manages for us are called Model classes. These are basically ordinary Swift classes that have a few SwiftData specific annotations added to them.
Here is the code for the Model classes we will use for this app:
import Foundation
import SwiftData

@Model
final class Student {
    @Attribute(.unique) var id: String = UUID().uuidString
    var first_name: String
    var last_name: String
    var grades: [Grade]

    init(id: String = UUID().uuidString, firstname: String, lastname: String) {
        self.id = id
        self.first_name = firstname
        self.last_name = lastname
        self.grades = []
    }
}

@Model
final class Quiz {
    @Attribute(.unique) var id: String = UUID().uuidString
    var name: String
    var points: Int
    var grades: [Grade]
    init(id: String = UUID().uuidString, name: String, points: Int) {
        self.id = id
        self.name = name
        self.points = points
        self.grades = []
    }
}

@Model
final class Grade {
    @Attribute(.unique) var id: String = UUID().uuidString
    var score : Int
    var student: Student?
    var quiz: Quiz?

    init(id: String = UUID().uuidString,score: Int) {
        self.id = id
        self.score = score
    }
}
SwiftData has two specific requirements for Model classes. First, they must be annotated with @Model. Second, each class needs to have a property that stores a unique identifier. In all three of these classes I have added an id property annotated with @Attribute to satisfy this requirement.
One final thing to note about these classes has to do with the relationships between the classes. Relationships between database entities is an important detail to think about: fortunately, SwiftData makes it very easy to capture these relationships in a very natural, object oriented way. The key relations here are a one to many relation that expresses the fact that a Student has many grades and a one to many relation that expresses the fact that a Quiz will have many grades assigned. These relations are captured in a very natural way in the class declarations. SwiftData is powerful enough to translate these object-oriented relations into relations in the database.
Setting up the Model Container
The next step in setting up SwiftData in our app is to set up a ModelContainer object. This object will be our gateway to the SwiftData system. When we create or destroy model objects we will need to insert or delete these objects from the ModelContainer.
The process of setting up a ModelContainer typically starts in our app's Application object. Here is the code for that class:
import SwiftUI
import SwiftData

@main
struct SwiftDataGradesApp: App {
    var sharedModelContainer: ModelContainer = {
        let schema = Schema([
            Student.self,Quiz.self,Grade.self
        ])
        let modelConfiguration = ModelConfiguration(schema: schema, isStoredInMemoryOnly: false)

        do {
            return try ModelContainer(for: schema, configurations: [modelConfiguration])
        } catch {
            fatalError("Could not create ModelContainer: \(error)")
        }
    }()

    var body: some Scene {
        WindowGroup {
            ContentView()
        }
        .modelContainer(sharedModelContainer)
    }
}
The code here creates a Schema object along with a ModelConfiguration object. These are then passed to the ModelContainer. Finally, we need to arrange for the ModelContainer to be made available to the components of our app. The standard way to do this is to pass down the ModelContainer as an environment object. The .modelContainer() modifier function is a convenience function designed to make that easy to do.
The ContentView class
Since our app's interface is a TabView with three views inside it, our app's first view class will set up the TabView:
import SwiftUI
import SwiftData

struct ContentView: View {

    var body: some View {
        TabView {
            StudentView().tabItem {
                Label("Students",systemImage: "person.fill")
            }
            QuizView().tabItem {
                Label("Quizzes",systemImage: "questionmark.folder")
            }
            GradeView().tabItem {
                Label("Grades",systemImage: "percent")
            }
        }
    }
}
The "More Components" example covered how to set up tab views.
Creating and listing Students
The first two views are used to set up Students and Quiz objects. Here is the code for the StudentView class:
struct StudentView: View {
    @Environment(\.modelContext) private var modelContext
    @Query private var students: [Student]
    @State var first_name : String = ""
    @State var last_name : String = ""
    var body: some View {
        VStack {
            List {
                ForEach(students) { student in
                    Text("\(student.first_name) \(student.last_name)")
                }.onDelete(perform: delete)
            }
            HStack {
                Text("First Name:")
                TextField("",text:$first_name).disableAutocorrection(true).textFieldStyle(.roundedBorder)
            }
            HStack {
                Text("Last Name:")
                TextField("",text:$last_name).disableAutocorrection(true).textFieldStyle(.roundedBorder)
            }
            Button("Add Student") {
                let student = Student(firstname: first_name, lastname: last_name)
                modelContext.insert(student)
                try? modelContext.save()
            }
        }
    }

    func delete(at offsets: IndexSet) {
        offsets.forEach { i in
            modelContext.delete(students[i])
        }
        try? modelContext.save()
    }
}
Note the property annotated with @Environment. This gives us access to the ModelContainer that was passed down to us an environment object.
A new kind of property you will see here is a SwiftData @Query property. In SwiftData a Query property is essentially a database query that pulls a set of objects from the database. In this view we are working with students, so we will want the list of all Student objects in the app.
By default a Query request will load all of the objects of a given type that are in the database. You can fetch just a subset of these objects by also supplying a predicate in the query request. We will see an example of this later in these notes.
This view will display a list of all of the Student objects that are currently in the system along with some additional elements that allow the user to create new students. The action closure for the 'Add Student' button demonstrates how to use SwiftData to make a new entity. We make a new Student object and then tell the ModelContainer to insert the new object and then save changes to the database.
There is also code in this view to demonstrate how to delete SwiftData objects. I added an onDelete() modifier to the list of students that calls the view's delete() method to handle deletions. Fortunately, the ModelContainer provides a delete() method that we can pass an object to delete. The object to delete sits in the array linked to our original fetch request.
The second view, which manages the list of quizzes, is very similar.
Managing Grades
Once we have a set of Students and Quizzes set up in our app we will be able to start recording Grades. Here is what that view looks like:
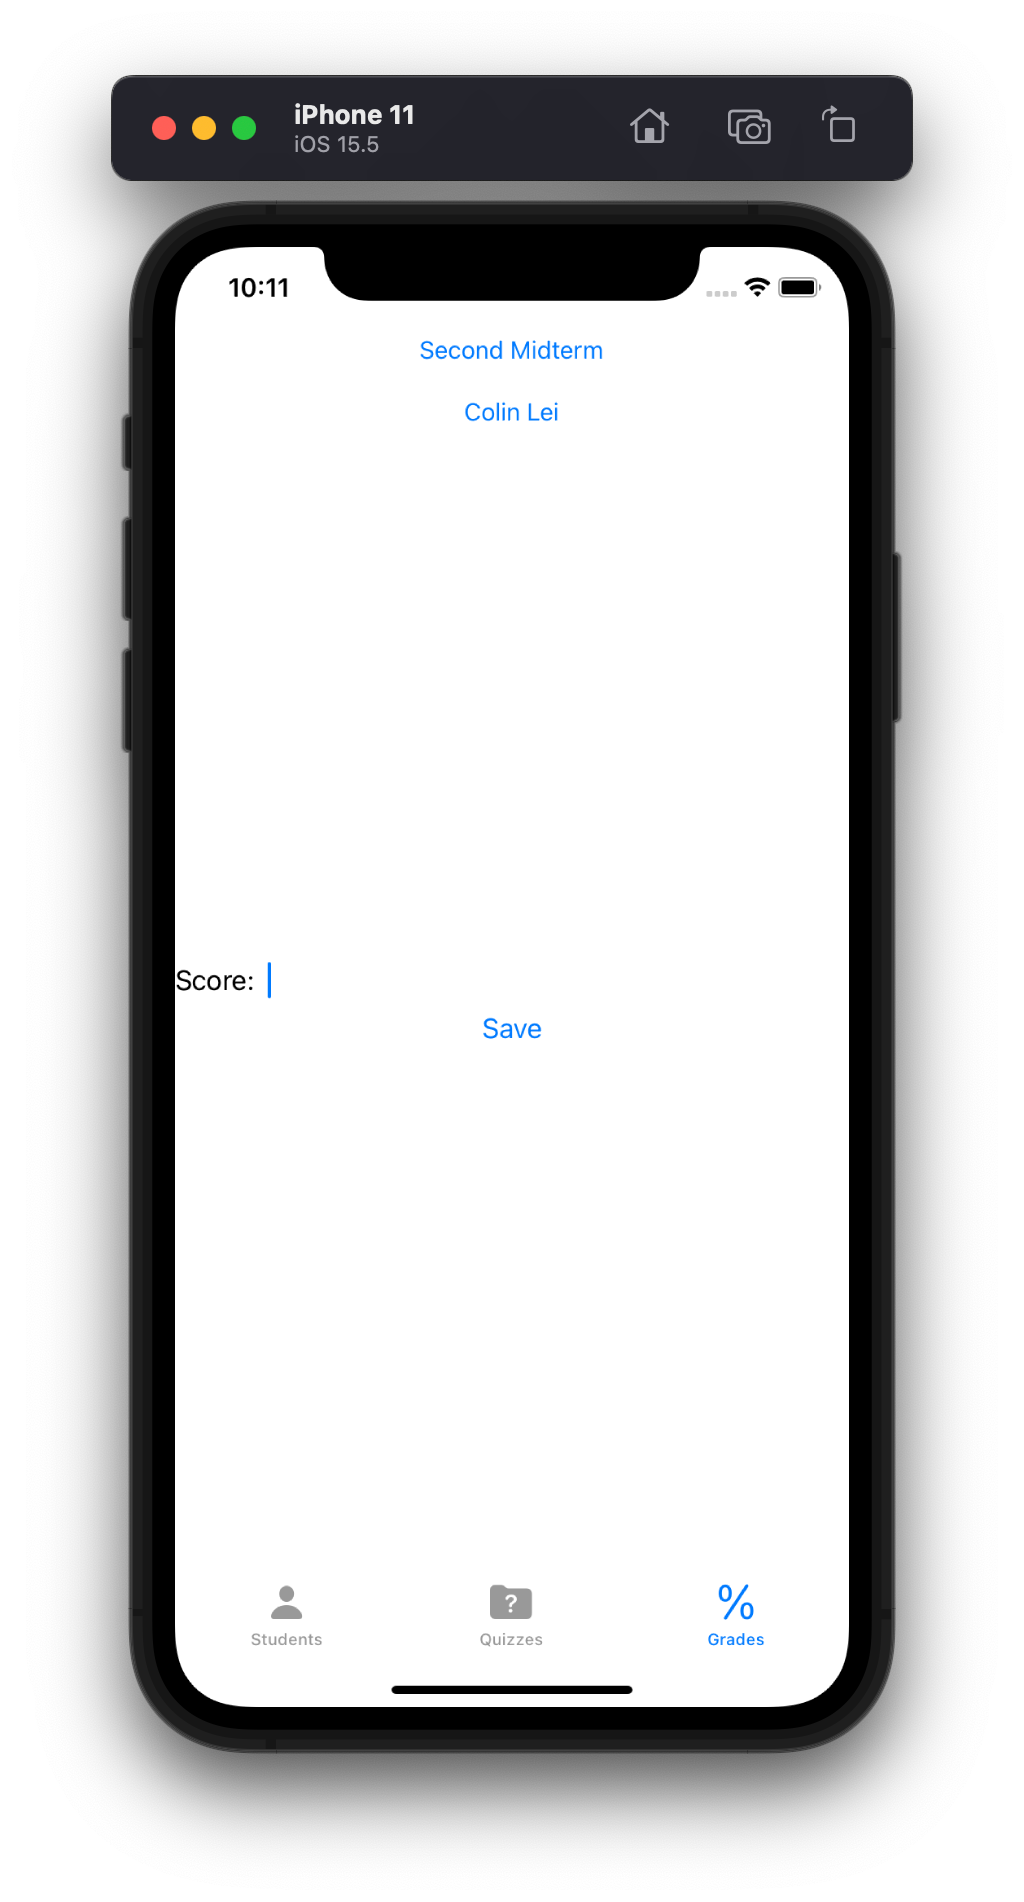
At the top of the view are two Picker objects that allow the user to select a Student from the list of available students and a Quiz from the list of available quiz objects. Below the pickers we have a text field where the user can enter a grade for that student on that quiz and a button to save the grade to the database. Note that in some cases the student/quiz combination we selected will already have a grade: in that case we will simply want to update the grade that we previously recorded.
Here now is the code for the GradeView:
struct GradeView: View {
    @Environment(\.modelContext) private var modelContext
    @Query private var quizzes: [Quiz]
    @Query private var students: [Student]
    @State var quiz : Quiz?
    @State var student : Student?
    var body: some View {
        if quizzes.count == 0 {
            Text("No quizzes available to display")
        } else if students.count == 0 {
            Text("No students available to display")
        } else {
            VStack {
                Picker(selection: $quiz,label:Text("Select a quiz:")) {
                    ForEach(quizzes) { q in
                        Text(q.name).tag(q.self as Quiz?)
                    }
                }
                Picker(selection: $student,label:Text("Select a student:")) {
                    ForEach(students) { s in
                        Text("\(s.first_name) \(s.last_name)").tag(s.self as Student?)
                    }
                }
                Spacer()
                if let q = quiz, let s = student {
                    GradeDetailView(student: s,quiz: q)
                }
                Spacer()
            }.onAppear {
                quiz = quizzes.first
                student = students.first
            }
        }
    }

}
As in the prior two views, there are @Query properties to load the list of all Student and Quiz objects. We then use the Picker class to make pickers that display these lists. When we set up a Picker we have to provide a selection property for the picker, which is a binding to a state variable that will store the user's selection from the picker. When we set up the items displayed in the picker with the ForEach construct we will also want to give each displayed choice a tag property that has the same type as the selection. When the user selects one of the picker items, the picker will copy the tag for that item into the selection property.
Once the user has selected a quiz from the first picker and a student from the second picker we will want to see if whether or not a Grade object has already been created for that combination and also give the user the chance to record a new grade or update the existing one. The logic needed to do all of this is encapsulated in a special GradeDetailView component.
Here is the code for that component:
struct GradeDetailView: View {
    @Environment(\.modelContext) private var modelContext
    let student : Student
    let quiz : Quiz
    @State var score : String = ""
    @Query var grades: [Grade]

    init(student: Student,quiz: Quiz) {
        self.student = student
        self.quiz = quiz
        let sId = student.id
        let qId = quiz.id
        _grades = Query(filter: #Predicate { grade in
            (grade.student?.id == sId) && (grade.quiz?.id == qId)
        })
    }

    var body: some View {
        VStack {
            if grades.isEmpty {
                HStack {
                    Text("Score:")
                    TextField("",text:$score)
                }
                Button("Save") {
                    let g = Grade(score: Int(score) ?? 0)
                    g.quiz = quiz
                    g.student = student
                    quiz.grades.append(g)
                    student.grades.append(g)
                    try? modelContext.save()
                }
            } else {
                Text("Existing score is \(grades[0].score)")
                HStack {
                    Text("Update score:")
                    TextField("",text:$score)
                }
                Button("Save") {
                    grades[0].score = Int(score) ?? 0
                    try? modelContext.save()
                }
            }
        }
    }

}
When the view loads, we will want to see if there is an existing grade for that student and that quiz. If so, we will display that existing score in the view. To set up the search for an existing I added a custom init() method here. The most important thing going on in that init() method is this line:
_grades = Query(filter: #Predicate { grade in
(grade.student?.id == sId) && (grade.quiz?.id == qId)
This line of code sets up a dynamic query that searches for the one Grade object that refers to this student and this quiz. The filter parameter in the Query provides a predicate, which is a lambda expression that will get applied to each Grade in the database. Only those Grades that evaluate to true in the predicate will get returned in the query result list.
In the body property you will see some logic that splits into two cases: either a Grade is already present or we will need to create a new one.
In the closure linked to the 'Save' button for each case you can see code to either update the points property of the existing Grade or create a new Grade object. After making either change we call the context's save() method to commit the changes to the database.