Testing with JUnit
We have seen that we can use Postman to test our REST api methods. As you have no doubt experienced, testing every interaction through Postman is a bit of tedious process. In these notes I am going to demonstrate how we can write automated tests directly in the Spring Tool Suite application to test our api.
The basic tool to run tests on code in Spring is the popular JUnit framework. Automated testing with JUnit is such an integral part of Spring Boot development that every project we create will already include support for JUnit through this dependency:
<dependency>
  <groupId>org.springframework.boot</groupId>
  <artifactId>spring-boot-starter-test</artifactId>
  <scope>test</scope>
</dependency>
Unit tests
One of the simplest testing strategies we can implement with JUnit is unit testing. In this approach we write tests for each method in a class.
An obvious set of classes to write unit tests for are the major service classes in our application. Since these classes do most of the meaningful work in our application, we will want to test these classes thoroughly.
As we will see below, writing unit tests for service class methods is a fairly mechanical process. Given this, we can easily farm out the work of writing unit tests to an AI system. All of the examples below were generated using our local coding model with Cline.
Test classes and tests
Here is the code for a simple example. In this example we are going to test just one method in one service, the save() method in the UserService class.
public class UserServiceTest {

    @Mock
    private PasswordService passwordService;

    @Mock
    private UserRepository userRepository;

    private UUID userId;
    private UserDTO userDto;
    private UserService userService;

    @BeforeEach
    public void setup() {
        MockitoAnnotations.openMocks(this);

        // Create service with mocked dependencies
        userService = new UserService();
        userService.passwordService = passwordService;
        userService.userRepository = userRepository;

        userId = UUID.randomUUID();

        userDto = new UserDTO();
        userDto.setName("testuser");
        userDto.setPassword("mySecretPassword123");

        // Mock password service
        Mockito.when(passwordService.hashPassword("mySecretPassword123")).thenReturn("hashedpassword");
    }

    @Test
    public void testSaveNewUser_Success() throws Exception {
        Mockito.reset(userRepository, passwordService);

        // Mock userRepository.findByName to return empty list (user doesn't exist)
        Mockito.when(userRepository.findByName("testuser")).thenReturn(new ArrayList<>());

        // Mock userRepository.save to save and return the user
        Mockito.when(userRepository.save(ArgumentMatchers.any(User.class))).thenAnswer(invocation -> {
            User arg = invocation.getArgument(0);
            arg.setUserid(userId);
            return arg;
        });

        String result = userService.save(userDto);

        assertNotNull(result);
        assertTrue(result.length() > 0);

        Mockito.verify(userRepository, Mockito.times(1)).findByName("testuser");
        Mockito.verify(passwordService, Mockito.times(1)).hashPassword("mySecretPassword123");
        Mockito.verify(userRepository, Mockito.times(1)).save(ArgumentMatchers.any(User.class));
    }
}
Here are some important aspects of this code.
- Our test methods get packaged in a test class. Test classes are saved in the
src/testdirectory, whose structure mirrors thesrc/maindirectory. - Test classes are containers for one or more test methods. Test methods are annotated with
@Test - To test a method we will often need to use a number of additional objects. Since many of these objects will get reused across multiple tests, the usual approach is to make these additional objects member variables in the test class.
- The work of initializing these additional objects is handled by a
setup()method, which is annotated with@BeforeEach. This guarantees that the objects will be initialized before any of the test methods run. - The purpose of each test method is to call the method we are testing. If that method returns a result, we will apply special JUnit assertion methods to that result. In the example above we expect that saving a user will return the UUID string for that user. The example uses the
assertNotNull()andassertTrue()methods to confirm that the returned string is present and non-empty. If an assertion fails the test method it appears in will also fail.
Mocking with Mockito
Just about every class in a Spring Boot application depends on other classes. For example, the UserService class needs the assistance of the PasswordService and UserRepository classes. When we test a method in the UserService class a bug in one of the classes that that UserService depends on could cause our method to fail.
To decouple the class we are testing from the classes it depends on, unit tests use a strategy called mocking. In this approach we create fake, or mock, classes with fake behaviors that always succeed.
To create and manage mock objects for JUnit tests we will use a special library named Mockito. This library will allow us to set up mock objects and specify how they should behave whenever one of their methods gets called.
The first step in using Mockito is to set up one or more mock objects. We do this by setting the mock objects up as member variables in the test class and annotating those objects with @Mock. During the setup() process we initialize all of our @Mock objects via a call to
MockitoAnnotations.openMocks(this);
Next, we connect our UserService to these mock classes it will depend on. In the setup() method you will see code that stores our mock PasswordService and UserRepository in our UserService object.
What makes these mock objects useful to us is the ability to attach fake methods to them. This is done with the Mockito library's static when() method. The when() method takes information about the method to fake as its parameter. If that method is supposed to return a result, we specify that with a thenReturn() or thenAnswer() method that allows us to set up a fake answer for the fake method to return.
Another important capability of mock objects is that they remember how many times their fake methods are invoked. After testing the method we want to test we use calls to Mockito.verify() to confirm that the fake methods have been invoked the number of times that we expect. If any of those verifications fail the test method they are embedded in will fail.
Running tests
To run our test methods we will make use of a test runner. If you have the extension pack for Java installed in Visual Studio Code you will have access to the test runner. You can access the test runner via the beaker icon that appears in the toolbar on the left side of the window.
In the panel on the left you will see a list of all of the test classes in your project. You can run tests for a particular test class by hovering your mouse over the class in this panel and clicking the run button.
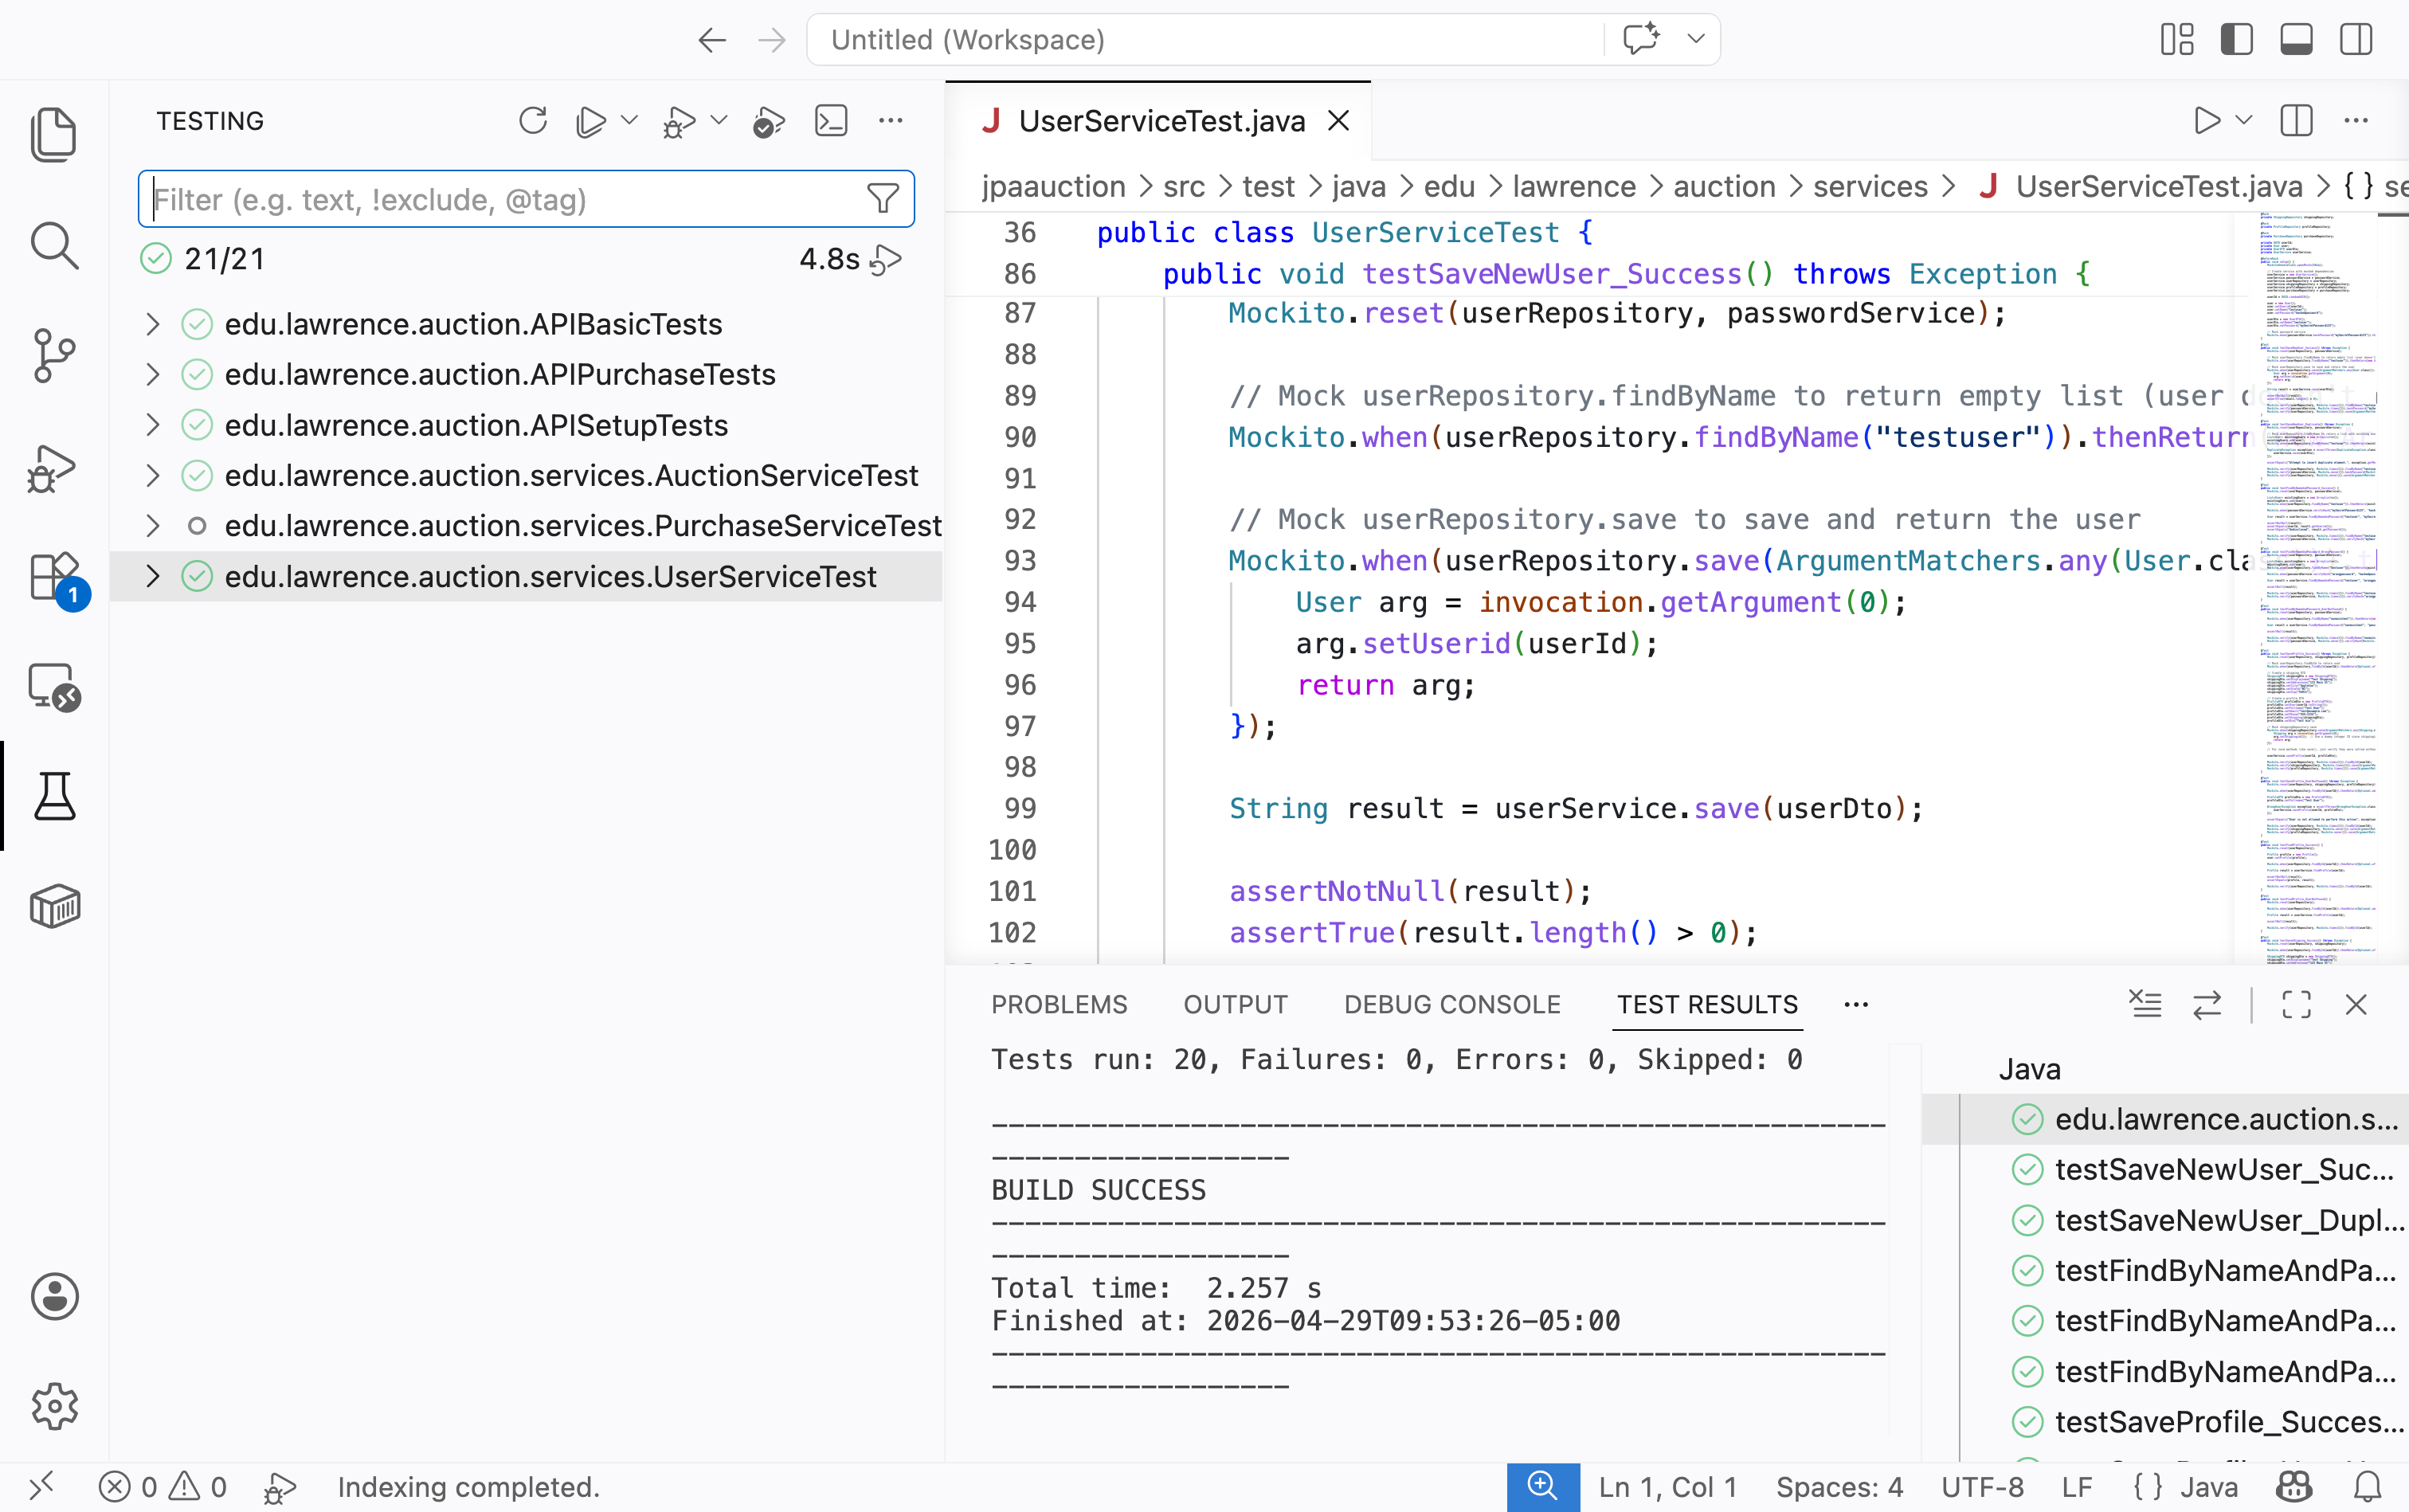
There is a second panel on the bottom that shows test results. This panel has a number of tabs. The most import of the tabs is the 'Test Results' tab, which shows a summary of which tests passed and which tests failed.
If a test fails you can scroll to the source code for the test. The assertion that caused the test to fail will be highlighted in the code.
Alternatively, if you have the debugging extension for Java installed you can also debug tests. You can set breakpoints in the test methods and then use the debugger to examine the values of variables and step through the test code line by line.