Installing MySQL and the MySQL Workbench
NetBeans comes with a built-in SQL database system called JavaDB, but is also compatible with a range of other databases. I have chosen the MySQL database server for use in this course. The Community Edition of MySQL is free software available for all major operating systems and can be freely redistributed. MySQL offers good support for Java SQL programming.
The main download page for MySQL software is located at dev.mysql.com/downloads/
Installing MySQL on Mac OS
Mac users should start by clicking the link for the MySQL Community Server on the main download page. This will take you to the download page for the server. On that page you will want to select version 8.0.41, and then select the correct OS version. If you have an Apple Silicon Mac (M1 or higher), make sure to select the ARM version. If you have an Intel Mac you will want the Intel version.
The page will offer you several versions of the package - select the DMG Archive version to download.
When you download the disk image for MySQL, you can double-click the dmg file to open the installation folder. Inside you will find a package file. Double-click this to run the installation package. During the installation process the installer will prompt you to create a root password. Please write this root password down and keep a copy in a safe place.
Next, go back to the main download page and click the link to download the MySQL Workbench application. Double-click the dmg file after downloading, and drag the MySQL workbench icon from that folder into your applications folder.
Installing MySQL on Windows
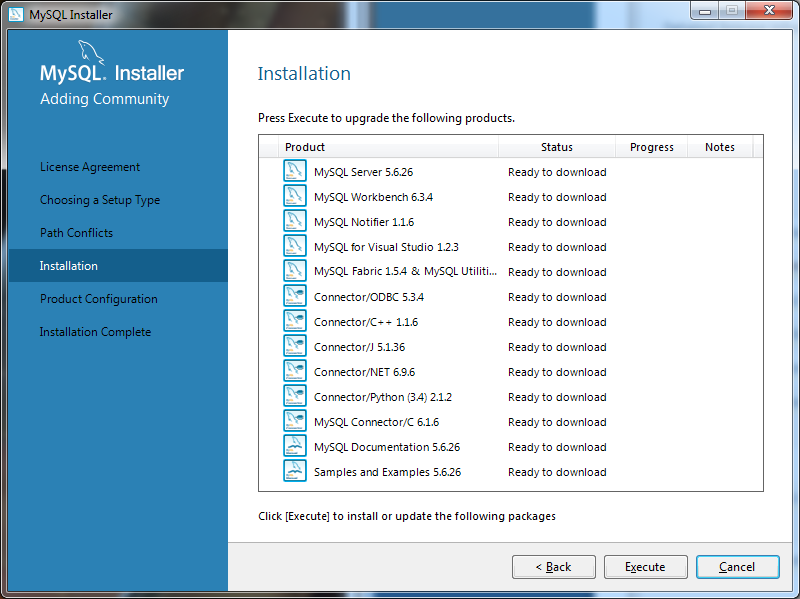
The MySQL installer for Windows is a unified installer package that will install both the MySQL server and the other tools you will need. From the main download page click the link for the Windows installer. Download the installer and double-click it to run the installer. When the installer starts, start by selecting the Developer Default installation type.
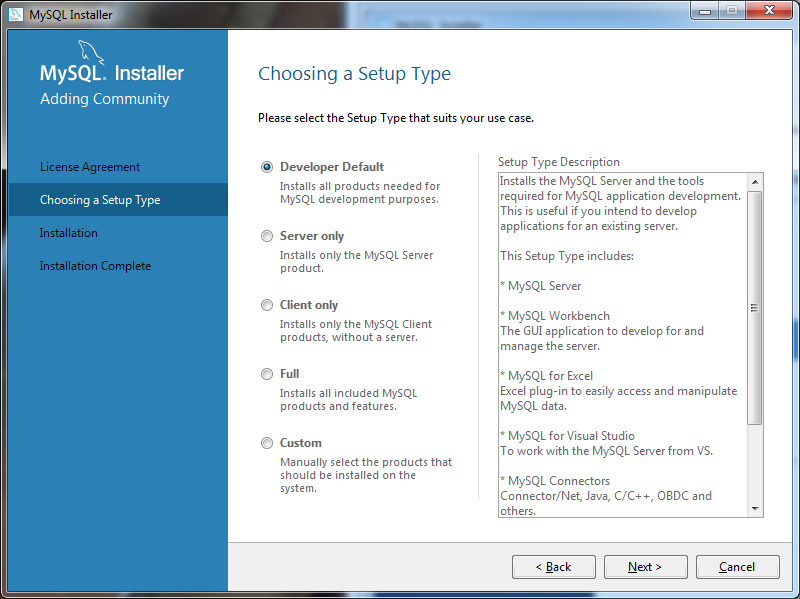
The installer will install all of the tools you will need to do MySQL development.
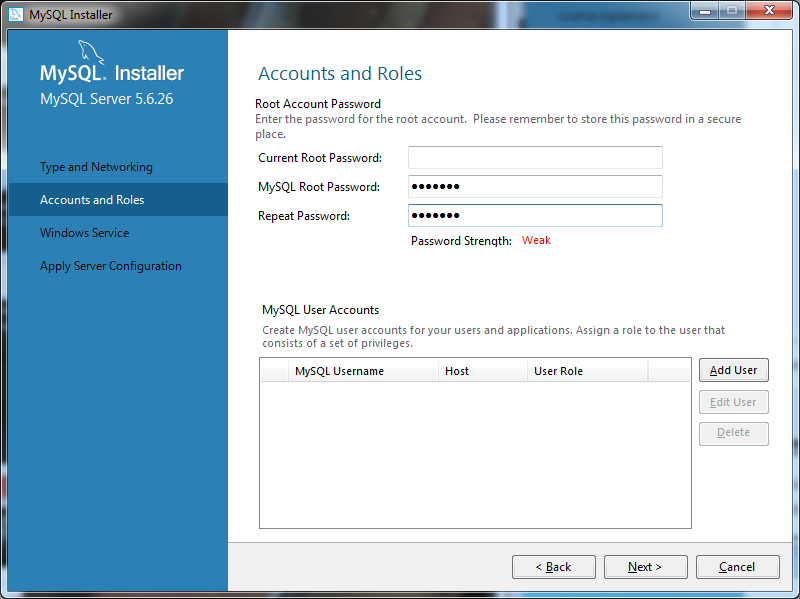
After the MySQL server is installed, the installer will walk you through a series of configuration screens. On one of the screens the installer will ask you to set up a root password. Write this password down and keep it in a safe place.
Leave the options on the final screen set as they are. These options will ensure that MySQL starts up automatically when your computer starts, so it will always be available.
Setting up a user account
When you installed the MySQL server software the installer should have prompted you to create a password for the root account.
Since everyone is going to have a different root password, we will never use the root account to connect to MySQL from our Java programs. Instead, everyone will set up a second user account and we will all use that account to do all of our interactions with MySQL.
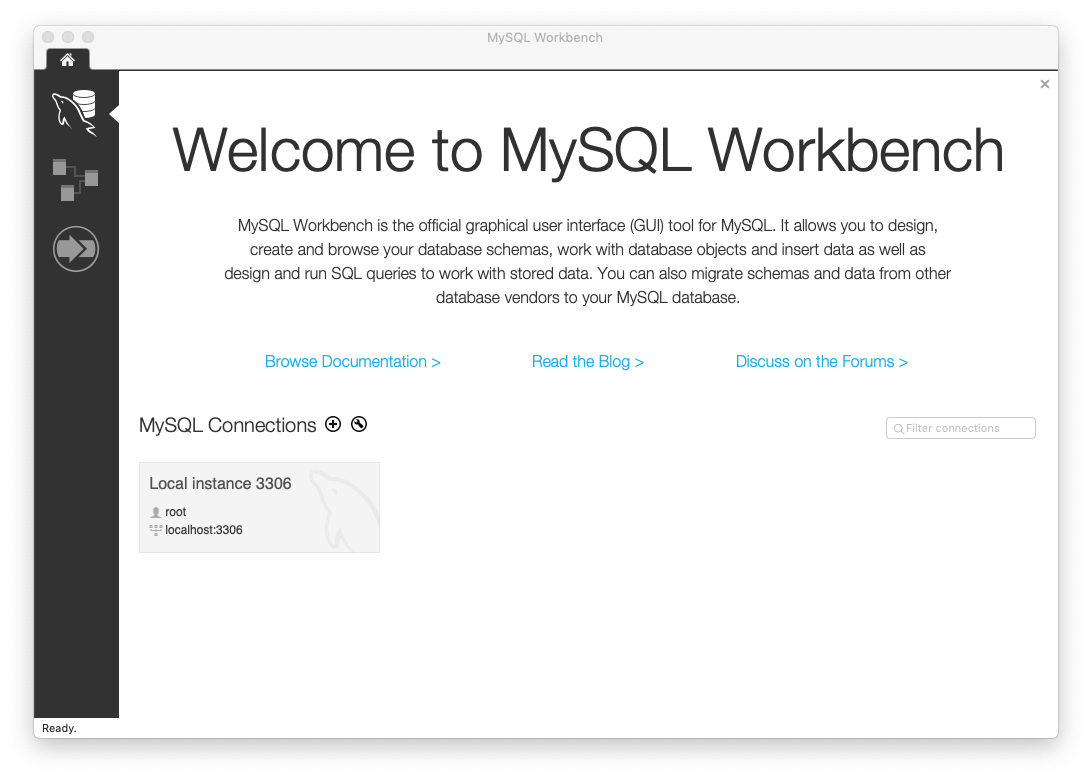
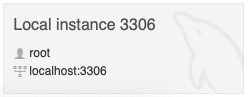
To set up this second account, start by launching the MySQL Workbench application. When it starts up should see a welcome screen that looks like this.
Click the button to connect to the local MySQL server
Click the Administration tab in the Navigator on the left and then click the Users and Privileges link.
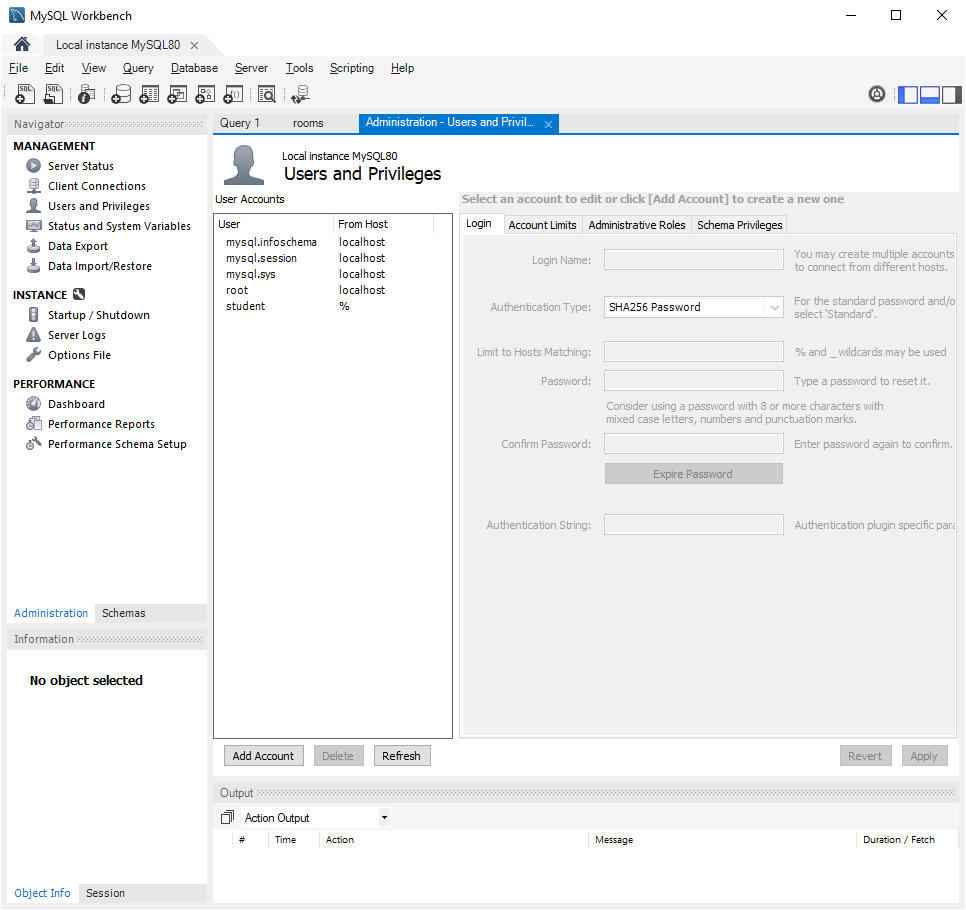
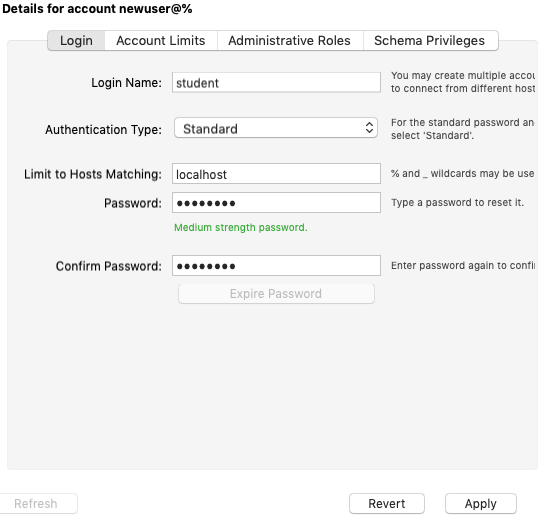
Click the Add Account button to create a new user account, and fill in the account details as shown here. Set the password for this new account to 'Cmsc250!' (with no quotes).
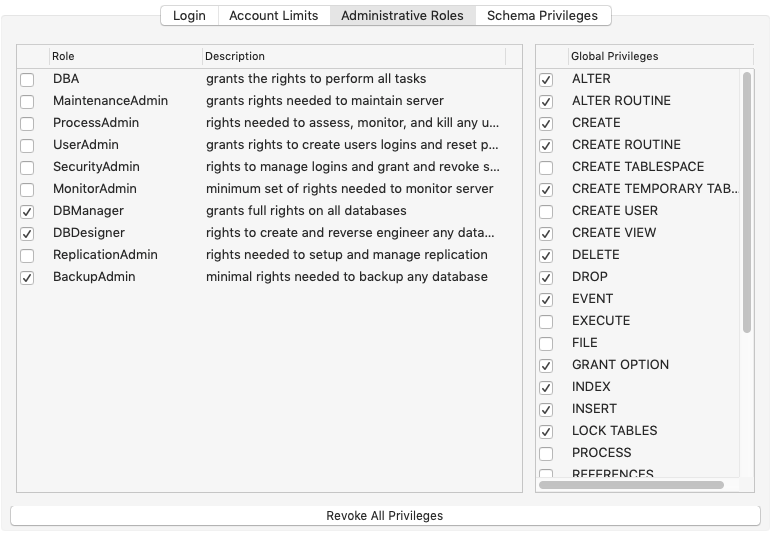
Click the Administrative Roles tab, and then click the DBManager role.
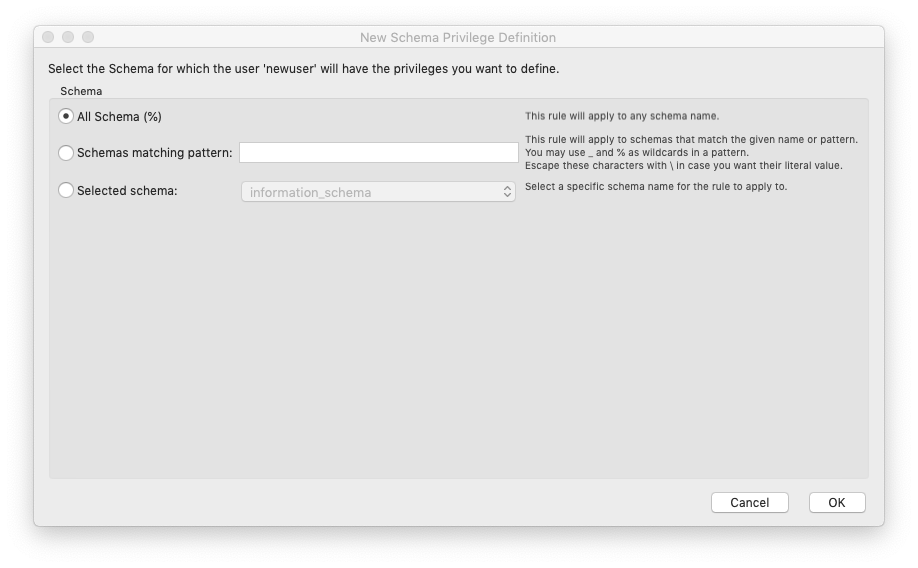
Click the Schema Privileges tab, and then the Add Entry... button.
In the dialog box that appears, leave the default setting and click OK.
Finally, click the Select "ALL" button and click Apply.
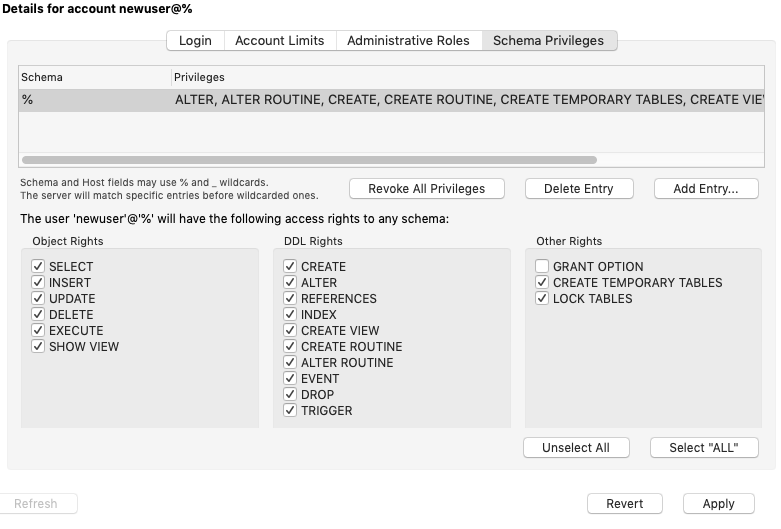
You have now set up a user account with the user name 'student' and password 'cmsc250!'. We will be using this account for all of our examples to connect to MySQL in a way that is consistent for everyone.
Getting NetBeans set up for MySQL
To create a NetBeans project that can interact with MySQL we will need to add a special MySQL connector library to our projects.
For all of our projects that interact with MySQL we will be using Maven as the build system. One of the nice features of Maven is that we can add a dependency to the pom.xml file that tells Maven to download and use a specified library. For any future project that needs to talk to MySQL we will need to add the following dependency to pom.xml:
<dependency>
    <groupId>mysql</groupId>
    <artifactId>mysql-connector-java</artifactId>
    <version>8.0.27</version>
</dependency>
Next, you might want to obtain a pre-constructed example database to work with. I will be using the student database for the remainder of these notes. You can get a copy of this database by clicking the button at the top of these notes to download today's sample project. Inside that project folder you will find a database folder that contains the files for the example database. This guide will explain how to import that database into MySQL.
Our first JDBC example
Below is the source code for today's example program. This program demonstrates how to use JDBC to connect to a database and extract some information from it.
import java.sql.*;

public class SimpleJDBC {
  public static void main(String[] args)
    throws SQLException, ClassNotFoundException {
    // Load the JDBC driver
    Class.forName("com.mysql.jdbc.Driver");
    System.out.println("Driver loaded");

    // Establish a connection
    Connection connection = DriverManager.getConnection
      ("jdbc:mysql://localhost:3306/student?user=student&password=Cmsc250!");

    System.out.println("Database connected");

    // Create a statement
    Statement statement = connection.createStatement();

    // Execute a statement
    ResultSet resultSet = statement.executeQuery
      ("select firstName, mi, lastName from Student where lastName "
        + " = 'Smith'");

    // Iterate through the result and print the student names
    while (resultSet.next())
      System.out.println(resultSet.getString(1) + "\t" +
        resultSet.getString(2) + "\t" + resultSet.getString(3));

    // Close the connection
    connection.close();
  }
}
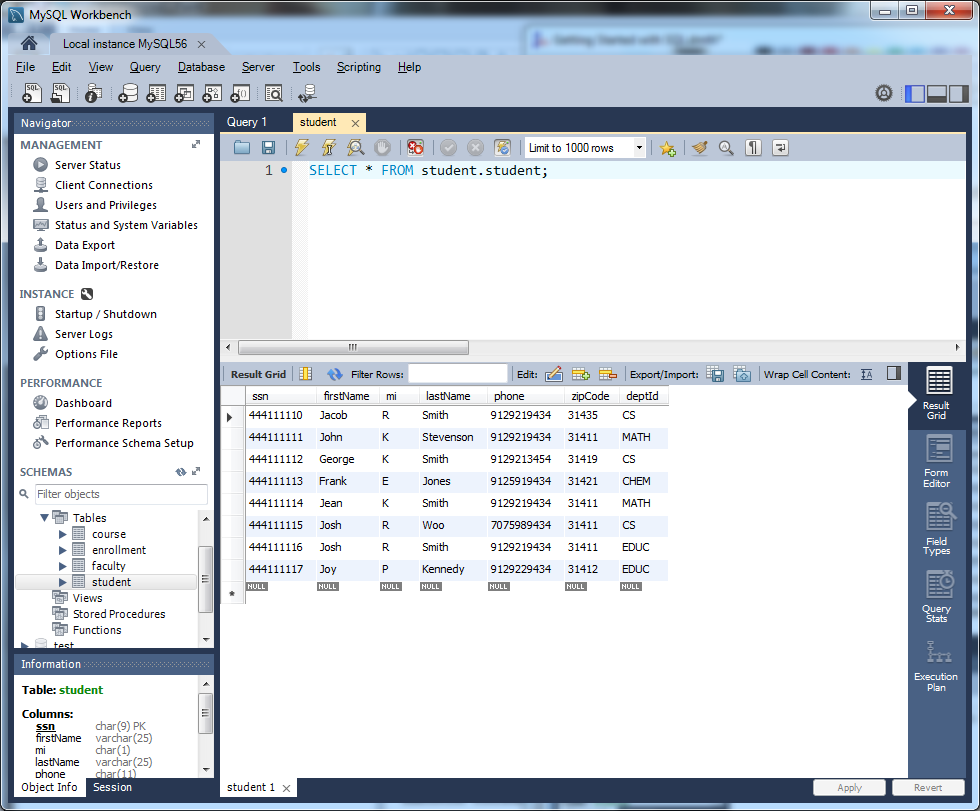
With the database and the JDBC driver in place, we are ready to run this program. The program establishes a connection to the student database and runs an SQL query against the database. The query asks the database to return the first name, middle initial, and last name of all entries in the Student table of the database whose last name is Smith. The results of the query come back in the form of a result set. The program then iterates through the result set printing the names of all students whose last name is Smith.
The output of this program should look like this:
Driver loaded
Database connected
Jacob    R      Smith
George   K      Smith
Jean     K      Smith
Josh     R      Smith
MySQL Workbench
Another tool that you will find useful as you work with MySQL is the MySQL Workbench.
The Workbench contains convenient tools for directly creating databases, tables, and entries in tables. You will find the Workbench convenient for testing your SQL code.
In addition to the select statement, you will typically need only three SQL statements to work with databases in this class.
To insert a new entry into a table, use the SQL insert statement.
insert into student (ssn,firstName,lastName,deptId) values ('100','Joe','Gregg','CS')
To change one or more fields in an existing row or rows, use the update statement.
update student set zipCode = '54911' where ssn = '100'
To delete one or more rows from a table use the delete statement with a where clause that identifies the rows to delete.
delete from student where ssn = '100'
You can find more information on SQL in the textbook in chapter 34. Chapter 34 is not part of the printed textbook. Instead, you can download a PDF for chapter 34 from the companion web site for the text.