Installing the software you will need
For this course you will need to install a Python interpreter and a development environment that you can use to write Python programs.
The software that we will be using to install and manage Python for us is Anaconda. You can download the installer for the Anaconda Individual Edition from https://www.anaconda.com
After you run the Anaconda installer, you should launch the Anaconda Navigator application.
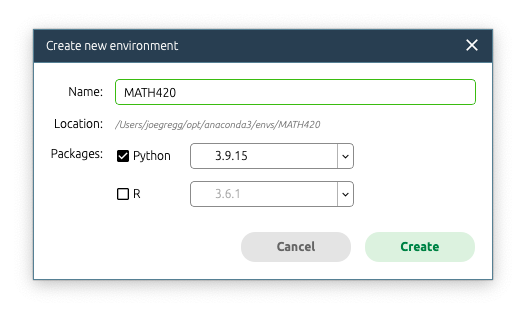
To help manage the Python system we will be using in this course you will need to create an Anaconda environment. To do this, click on the Environments tab in Navigator and then click the Create button at the bottom of the window.

Name your new environment MATH420 and make sure that the Python option is checked.

We are also going to be working with Jupyter notebooks in this course. To install support for Jupyter, type Jupyter in the search box in navigator and select the 'Not Installed' option from the pull-down menu.

Select the Jupyter package from the package list and click apply.
Next, download the installer for Visual Studio Code from https://code.visualstudio.com/ and run the installer.
Visual Studio Code is a popular open source code editor. Visual Studio Code is designed to work with many popular programming languages, including Python.
To configure Visual Studio Code to work with Python, you will need to install a couple of extensions in Visual Studio Code. Start up Visual Studio Code and click the extensions tab in the tab bar on the left edge of the window. This will bring up a list of extensions you can install. First type Python in the search box and install the Python extension.
Next, type Jupyter in the search box and install the Jupyter notebook extension.
Setting up the environment in VS Code
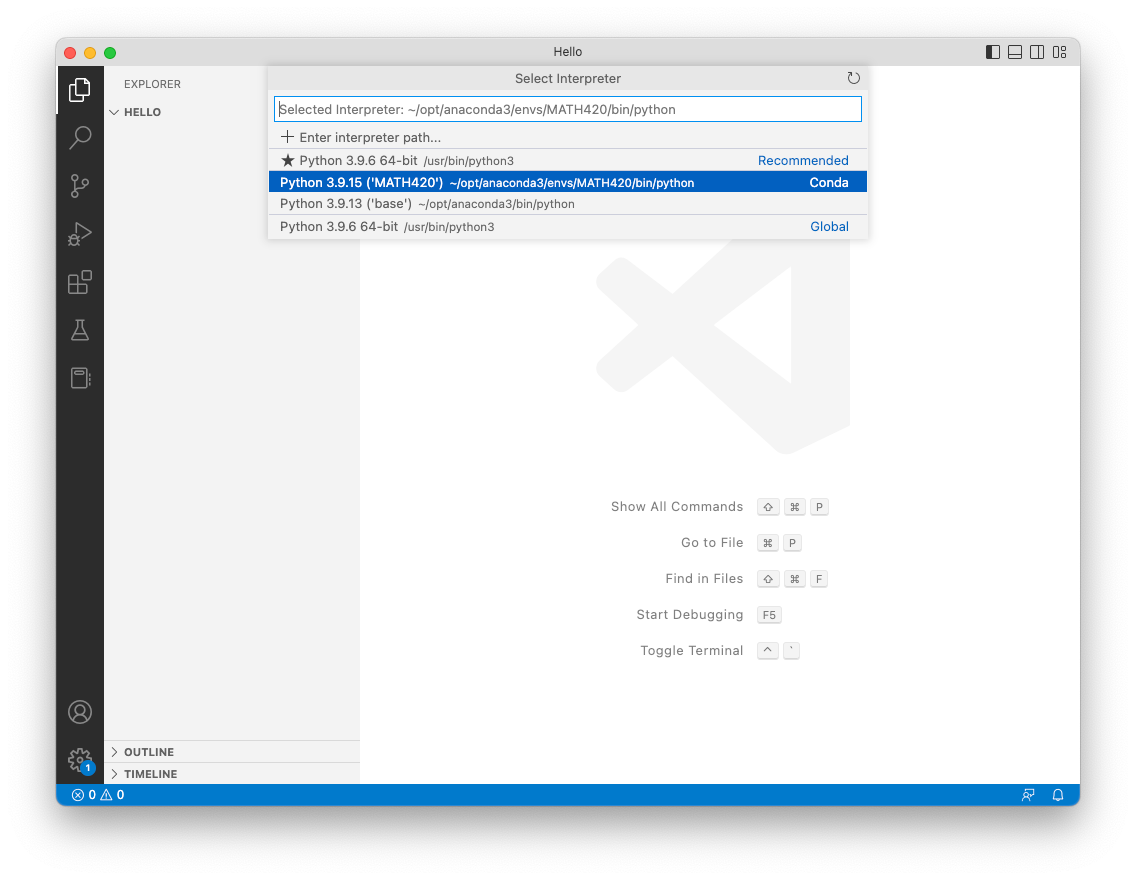
Before we start programming in Python in Visual Studio Code we have to select a Python environment. To do this, bring up the command palette in VSCode by pressing the command-shift-p key combination on mac or control-shift-p key combination on windows. Select the Python: Select Interpreter command, then select the python interpreter in the MATH420 environment you set up earlier.

Creating your first Jupyter notebook
Visual Studio Code expects you to create a folder for each programming project you work on. You should start by making a Projects folder in a convenient location. You will be placing the project folders for each project in this course in that folder.
For our first example, create folder named Hello in your projects folder.
To open this project folder in Visual Studio Code, click the files tab in the tab bar, then click the Open Folder button.
Initially the project folder is empty. The next step is to create a Python source code file in the project. To do this, click on the new file button to the right of the folder name. Alternatively, you can select the New File command from the File menu.

Name your new file hello.ipynb. The .ipynb extension identifies this file as a Jupyter notebook file.
Type or copy and paste the following line of code into the first cell in the notebook.
print("Hello, World!")
Then click the triangular run button next to the cell to execute the Python code in the cell. The output generated by the code in the cell will appear below the cell.
Installing additional packages
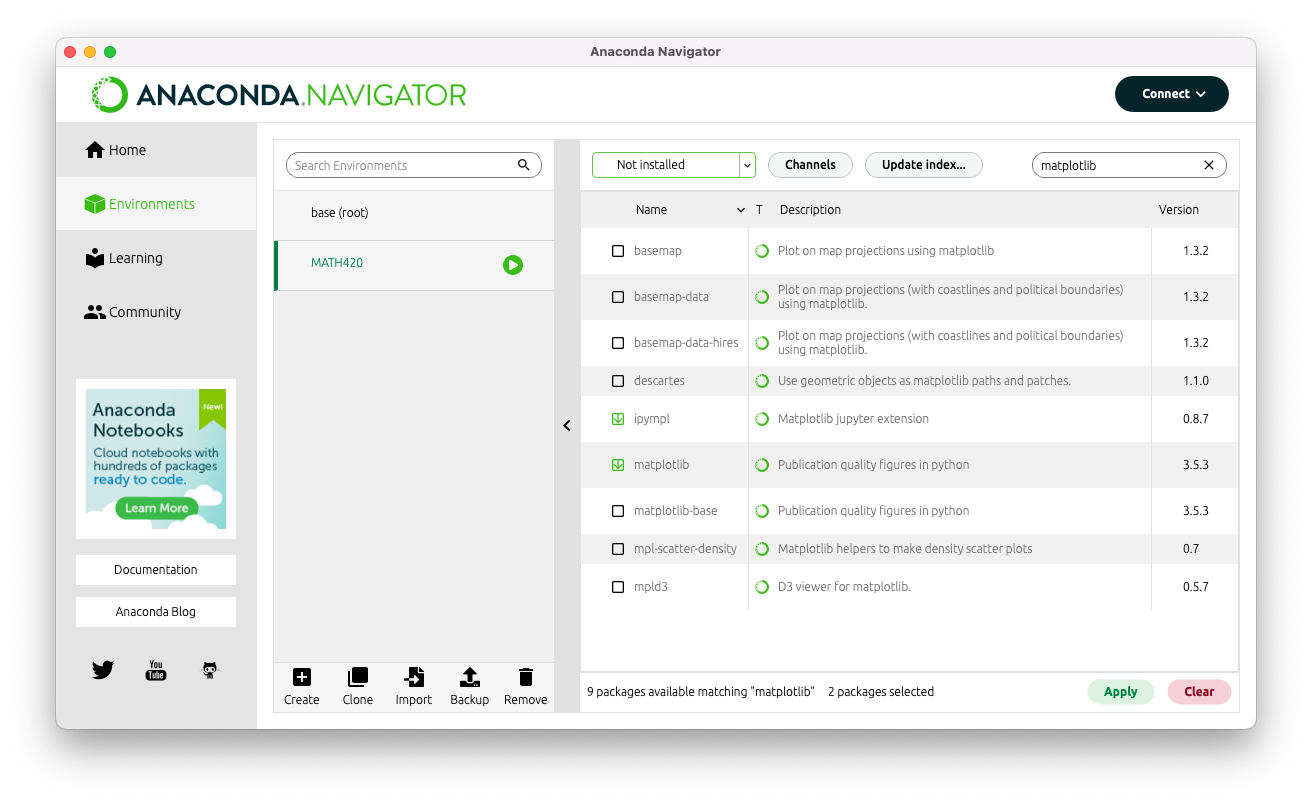
In our first full example notebook we are going to be doing some plotting. To enable plotting in Jupyter, we will need to install a couple of packages in Anaconda Navigator. Start up Anaconda Navigator and select the environments tab and your MATH420 environment. Next, type matplotlib in the search box and 'Not installed' from the pull-down menu. Check the options to install the ipympl and matplotlib packages and then click the Apply button.

In later notebooks we are also going to be working with the sympy and scipy packages. If you want to, you can go ahead and also install those packages in your environment.
Open the example notebook
Click the blue button at the top of these lecture notes to download an archive containing the example notebooks for this course. Extract the folder from the archive, and then open the folder containing the notebooks in Visual Studio Code. Double click the file intro.ipynb in Visual Studio Code to open that first example notebook.
Before doing any work with the notebook, make sure that you have the correct Python interpreter selected. Press the command-shift-p key combination (control-shift-p on windows) to bring up the command palette and search for the Python: Select Interpreter command. From the list that pops up, select the Python interpreter in your MATH420 environment.
The notebook I provided has outputs precomputed for all of its cells. If you would like to recompute the outputs, you can press the 'Clear Outputs of All Cells' button. After doing that you can either press the 'Run All' button at the top of the notebook or go down the list of cells pressing the run button for each individual cell.